Snowman Cake Pops warm my heart like a cozy winter’s day in Asheville, where the air turns crisp and sweet holiday smells dance through the homes. I still remember the first time I made these delightful treats. My grandchildren were visiting, brimming with excitement over the snow piling up outside. Their laughter filled the kitchen as we gathered around the counter—a perfect blend of chaos and joy, which is the essence of family cooking. As I shaped the cake pops into whimsical snowmen, I felt the same nostalgia that comes with any beloved recipe passed down through generations. Each coating of white chocolate felt like wrapping each pop in a fluffy winter coat, ready for a playful snowy adventure. Those simple Snowman Cake Pops became an instant family favorite, and seeing their little faces light up has made this tradition a cherished memory I’ll hold close forever.
Table of Contents
Flavor and Popularity
The Unique Flavor Profile of Snowman Cake Pops
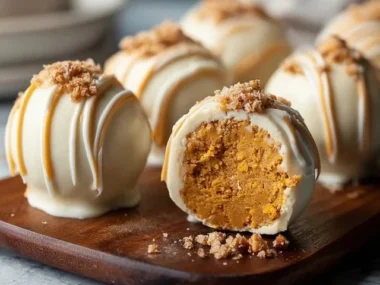
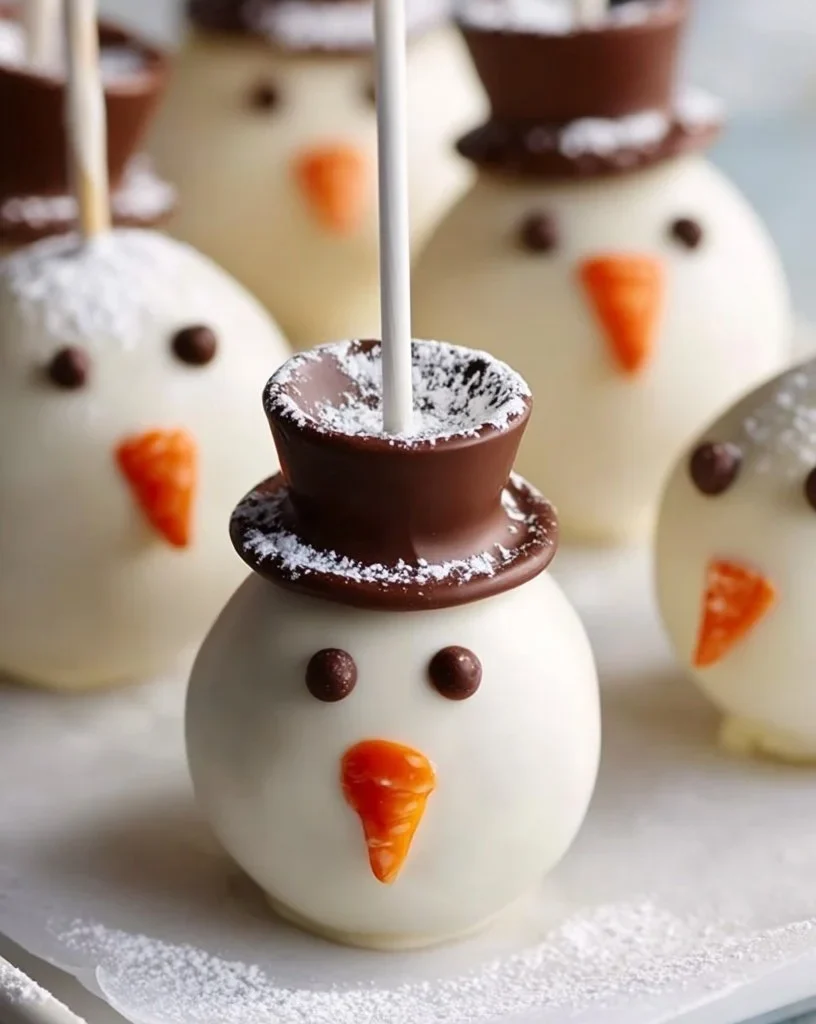
At first glance, Snowman Cake Pops might seem like just a cute holiday treat, but the appeal goes far beyond their playful appearance. The base typically carries a delicious blend of moist cake and creamy frosting, creating a sweet interior that brings comfort with every bite. White chocolate coating lends a smooth, velvety texture, while the addition of sprinkles or edible glitter adds a pop of color. The contrast between the rich chocolate and the cake’s softness creates a delightful experience.
While the classic recipe usually leans toward vanilla or chocolate cake, don’t be afraid to experiment! Imagine the magic of chocolate mint or sea salt caramel. Finding ways to elevate the flavor profile through different cake mixtures or coatings makes these treats truly adaptable for any palate. The flavors not only complement the holiday spirit but also invite delightful nostalgia, making these cake pops a festive favorite.
Why This Recipe Is a Family Favorite and Crowd-Pleaser
I’ve learned over the years that food often symbolizes love, especially during the holidays. Snowman Cake Pops fit this mold perfectly. They bring friends and family together, sparking joy in every bite. You cannot help but smile as you serve these charming creations at Christmas gatherings or winter parties.
Their portable size makes them ideal for sharing, whether you find yourself passing them around at a family gathering or packing them up for a winter potluck. Each bite unleashes a wave of sweetness that reminds you of simpler, happier times. Kids and adults alike are drawn to these cake pops, forging memories that become delicious and heartwarming stories shared around the table.
Ingredients and Preparation
Essential Ingredients and Possible Substitutions
To make these delightful Snowman Cake Pops, you’ll want to gather a few crucial ingredients. Here’s what you’ll need:

Cake: Start with your favorite vanilla or chocolate cake mix. You could also go the homemade route if you’re feeling adventurous!
Frosting: Pick an equally delicious frosting to mix with the crumbled cake, like buttercream or cream cheese frosting for a delightful tang.
White Chocolate: Melted white chocolate is essential for that snowy coating. If you’re looking for a lighter option, consider using almond bark as a substitute.
Decorative Elements: Grab black and orange candy melts, edible eyes, and colorful sprinkles or chocolate chips for the finishing touches on your snowman.
If you need to swap out ingredients, don’t worry! You can replace cake mix with a gluten-free variety or use dairy-free butter for a lactose-free version. Creative flavor twists like lemon cake or red velvet can also add an unexpected flair if you’re daring enough!
Step-by-Step Recipe Instructions with Tips
Bake Your Cake: Follow the instructions on your cake mix’s package. Allow it to cool completely before breaking it into crumbs.
Mix the Crumbs with Frosting: In a large mixing bowl, combine the cake crumbs and frosting until you achieve a dough-like consistency. I love using my hands for this—it’s oddly therapeutic!
Shape into Balls: Roll the mixture into 1-inch balls and place them on a baking sheet lined with parchment paper. Chill them in the refrigerator for about an hour to firm them up. This will help keep their shape when you dip them into the chocolate.
Prepare the White Chocolate Coating: Melt your white chocolate in a microwave-safe bowl, heating it in 30-second intervals until smooth and creamy.
Coat the Pops: Dip each cake pop in the melted white chocolate, allowing the excess to drip off. Place them back on the parchment paper.
Decorate Your Snowmen: While the chocolate is still wet, affix the edible eyes, and use small pieces of the candy melts to create buttons and noses. You can also sprinkle in festive colors for flair.
Let Them Set: Allow the decorated pops to sit until they harden completely. Store them in an airtight container to maintain their freshness.
Making Snowman Cake Pops is not just about following a recipe; it’s about making memories with loved ones, indulging in joyful laughter, and savoring the sweet rewards of togetherness.
Cooking Techniques and Tips
How to Cook Snowman Cake Pops Perfectly
The secret to perfecting these cake pops lies in your attention to detail at each stage of the process. Cooling the cake adequately before mixing is crucial; a warm cake can lead to an overly gooey mixture that’s hard to shape.
Additionally, ensure that your melted chocolate isn’t too hot or too thick. If you find it difficult to dip the cake pops, just add a small drizzle of vegetable oil to the melted chocolate to achieve a smoother consistency. This little trick ensures a lovely, even coating every time!
Common Mistakes to Avoid
It’s easy to get caught up in the excitement, but here are some common pitfalls to watch out for:
Overmixing the Cake: When combining the cake and frosting, mix just until combined. Overmixing can lead to dry cake pops.
Neglecting to Chill: Skipping the chilling process makes shaping the pops more of a challenge and may result in any decorations sliding down the pops while they’re setting.
Not Allowing the Chocolate To Cool: If the chocolate is too hot, it can cause the cake pops to melt slightly and lose their shape. Allow your melted chocolate to cool just a bit before dipping.

Health Benefits and Serving Suggestions
Nutritional Value of Snowman Cake Pops
While Snowman Cake Pops are undoubtedly a treat, they can still provide a small dose of joy in moderation. If you’re looking to balance indulgence with nutrition, consider swapping out some ingredients for more wholesome options. For instance, use a whole-wheat cake mix or reduce the amount of frosting to lower the calorie content slightly. You can also add in crushed nuts or dried fruits to boost nutritional value and texture!
Regardless, remember that it’s all about balance. Enjoying these treats with family or friends makes them all the more special, and the sweet memories created outweigh the calorie count in my book!
Best Ways to Serve and Pair This Dish
Consider serving these cake pops on a whimsical dessert table filled with holiday-themed delights, or create a DIY hot chocolate bar alongside them. Nothing pairs better with a delightful sweet than a warm beverage to cozy up with during frosty evenings!
As you serve the Snowman Cake Pops, share stories filled with laughter and memories wrapped in warm hugs. That’s what truly enhances the experience—delighting in each other’s company.
FAQ Section
What type of mushrooms are best for Snowman Cake Pops?
Snowman Cake Pops are cake-based, so mushrooms are not typically used in this fun treat. However, if you’re curious about textures, consider experimenting with flavored cake mixes or frostings.
Can I use dried garlic instead of fresh?
Dried garlic does not belong in your Snowman Cake Pops recipe, as garlic is not an ingredient here. Stick to sweet dressings and embellishments!
How do I store leftover Snowman Cake Pops?
Store your leftover Snowman Cake Pops in an airtight container in the refrigerator for up to a week. These delicious treats also hold up nicely for a couple of days at room temperature, making for delightful snacks.
Can I freeze Snowman Cake Pops?
You can freeze Snowman Cake Pops for up to three months. Just make sure to keep them wrapped well to prevent freezer burn. When you’re ready to enjoy them again, simply let them thaw in the refrigerator for a few hours.
Creating Snowman Cake Pops is about more than just making a treat; it’s about the love and warmth shared with family and friends. If you’re like me, you understand the joy of gathering in the kitchen to create something special. Trust me, you’ll want to make these snowy delights again and again. They remind me that during the festive season, it’s the sweet memories we create that truly warm our hearts. Enjoy every moment in the process, and relish the flavors and laughter that come with these magical cake pops!
Print
Snowman Cake Pops
Delightful Snowman Cake Pops perfect for holiday gatherings, blending moist cake with creamy frosting and a snowy white chocolate coating.
- Total Time: 45 minutes
- Yield: 20 servings
Ingredients
- 1 package vanilla or chocolate cake mix
- 1 tub buttercream or cream cheese frosting
- 2 cups melted white chocolate
- Black and orange candy melts
- Edible eyes
- Colorful sprinkles or chocolate chips
Instructions
- Bake the cake according to package instructions and allow it to cool completely.
- Mix the cake crumbs with frosting until you achieve a dough-like consistency.
- Roll the mixture into 1-inch balls and chill in the refrigerator for an hour.
- Melt white chocolate in 30-second intervals until smooth.
- Dip each cake pop in the melted white chocolate and allow excess to drip off.
- While the chocolate is still wet, attach edible eyes and use candy melts for buttons and noses.
- Allow the pops to harden completely before serving. Store in an airtight container.
Notes
For a lighter option, consider using almond bark instead of white chocolate. You can also experiment with different cake flavors for variety.
- Prep Time: 15 minutes
- Cook Time: 30 minutes
- Category: Dessert
- Method: Baking
- Cuisine: American
- Diet: Vegetarian