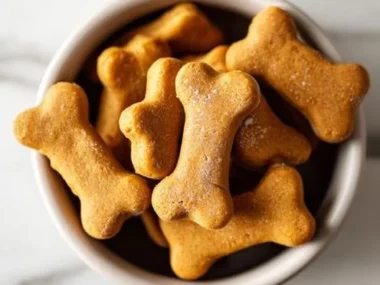
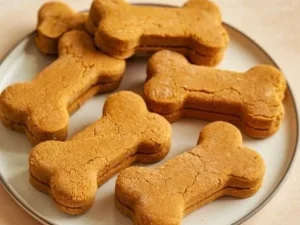
There’s something truly magical about the first frost of the season—the world transforms, and autumn’s rich, cozy flavors begin to weave their way into our kitchens. I remember the first time I made DIY Frozen Pumpkin Bites; the air was crisp, and I was looking for a way to savor the taste of fall long after the Jack-o’-lanterns had faded. As I roasted pumpkin, the kitchen filled with a warm aroma that made my heart swell. Each bite was a burst of sweetness, perfectly balanced with spices that felt like a hug from my grandmother, who always taught me that cooking is a way to share love.
It’s funny how a simple recipe can take you back to cherished memories, making the heart race with nostalgia. DIY Frozen Pumpkin Bites became a staple in my home, a delightful treat everyone—especially those sweet grandkids—looks forward to. The combination of earthy pumpkin, cinnamon, and a dash of nutmeg brings comfort, reminding me of warm afternoons in the kitchen, laughing and cooking as the leaves danced outside. Therefore, I’m excited to share this delightful recipe with you, and trust me, once you try these bites, you’ll find yourself making them year-round!
Flavor and Popularity
The Unique Flavor Profile of DIY Frozen Pumpkin Bites
When you think of pumpkin, it’s hard to resist the thought of its creamy texture and aromatic flavor. DIY Frozen Pumpkin Bites capture the essence of fall in every single bite. The base, made from roasted pumpkin, brings a natural sweetness, perfectly complemented by the warm spice of cinnamon and the hint of earthy nutmeg. Each bite melts in your mouth, providing that comforting feel you crave when the temperatures dip.
Beyond taste, the real charm of these bites lies in their versatility. You can enjoy them as a snack, a healthy addition to your morning routine, or even as a dessert. They fit well into various diets, thanks to their naturally gluten-free and dairy-free ingredients. Whether served with a dollop of yogurt, drizzled with honey, or simply enjoyed as is, they bring a joy that is hard to match.
Why This Recipe Is a Family Favorite and Crowd-Pleaser
Ever since I shared my first batch of DIY Frozen Pumpkin Bites at a family gathering, they have become a beloved favorite. It was a chilly evening, and we gathered around the fire, sharing stories and snacks. As I offered them to my family, their eyes lit up with delight. There’s something incredibly special about making something from the heart and seeing others enjoy it. These pumpkin bites quickly became a go-to treat for everything from holiday gatherings to weekend movie nights.
What’s more, children and adults alike can never resist the allure of something that resembles a dessert but is packed with wholesome ingredients. My grandkids adore them, and I appreciate knowing they’re getting something nutritious without even realizing it. The bites not only provide a delicious indulgence but also spark joy, laughter, and cherished memories with every shared bite.
Ingredients and Preparation
Essential Ingredients and Possible Substitutions
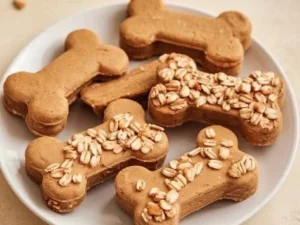
To create these delightful DIY Frozen Pumpkin Bites, you’ll need a few essential ingredients. Here’s what you’ll gather:
- Pureed pumpkin: Freshly roasted or canned—either works beautifully.
- Sweetener: I love using maple syrup or honey for that natural sweetness.
- Spices: Cinnamon, nutmeg, and a pinch of salt enhance the flavor.
- Oats: Rolled or quick oats provide texture and make it filling.
- Nut butter: Almond or peanut butter adds a creamy richness.
Now, if you find yourself short on nut butter, I often swap it for applesauce or yogurt for a lighter version. When it comes to sweeteners, feel free to adjust based on your preference; brown sugar or agave syrup can be great alternatives.
Step-by-Step Recipe Instructions with Tips
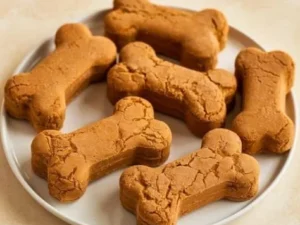
- Preheat your oven to 350°F (175°C). This ensures an even bake for your pumpkin.
- If using fresh pumpkin, cut it open, remove the seeds, and roast it face down on a baking sheet for about 40 minutes or until soft. If you’re using canned pumpkin, skip this step!
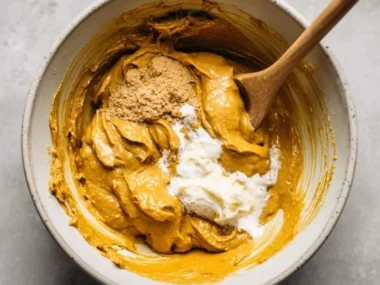
- In a mixing bowl, combine the pureed pumpkin, oats, nut butter, chosen sweetener, and spices. This mixture should be well-combined and slightly sticky—if it’s too dry, add a splash of milk or water.
- Using a melon baller or your hands, scoop out small portions and roll them into bite-sized balls. Place them on a lined baking sheet.
- Bake for 15-20 minutes or until they slightly firm up and start getting a lovely golden hue.
- Once baked, let them cool and then freeze on a sheet for a couple of hours before transferring into an airtight container for longer storage.
Cooking Techniques and Tips
How to Cook DIY Frozen Pumpkin Bites Perfectly
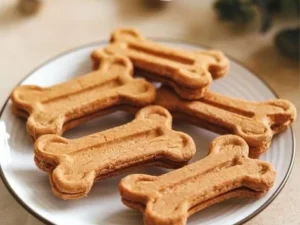
Achieving the perfect consistency for DIY Frozen Pumpkin Bites is all about the balance of moisture. If they’re too wet, they won’t hold their shape; if they’re too dry, they’ll lose that delightful melt-in-your-mouth quality. Be sure to measure your ingredients carefully and adjust to your preference. If you desire a bit more richness, you can add dark chocolate chips, nuts, or even dried fruit to the mix.
Common Mistakes to Avoid
A common pitfall is overbaking, which can lead to dry bites that lack that coveted moistened texture. Keep an eye on them during the last few minutes of baking. Also, make sure to cool them completely before freezing. If you attempt to store them while they’re warm, they’ll stick together and lose that perfect bite.
Health Benefits and Serving Suggestions
Nutritional Value of DIY Frozen Pumpkin Bites
Not only do DIY Frozen Pumpkin Bites provide comfort, but they’re also packed with nutrients. Pumpkins are rich in vitamin A, which supports healthy vision, and they offer antioxidants that help fend off disease. Alongside the oats, which are loaded with fiber and protein, these bites become a perfectly balanced snack that fills you up without weighing you down.
Best Ways to Serve and Pair This Dish
You can enjoy these bites on their own, but for a little twist, try serving them with a dollop of yogurt drizzled with honey or a side of maple syrup for dipping. They also pair exceptionally well with a warm cup of chai tea or spiced hot cocoa, making them ideal for those chilly evenings when you want to get cozy.
FAQ Section
What type of mushrooms are best for DIY Frozen Pumpkin Bites?
While mushrooms don’t typically pair with pumpkin bites, they can elevate the savory side. If you seek that kick, try shiitake for an earthy flavor or cremini for a nuttier touch, finely chopped and added to a savory variant of the pumpkin bites.
Can I use dried garlic instead of fresh?
Yes, you can use dried garlic. However, keep in mind that dried garlic is more concentrated, so use less—about a third of the amount you would for fresh garlic to avoid overpowering the lovely pumpkin flavor.
How do I store leftover DIY Frozen Pumpkin Bites?
Place any leftovers in an airtight container in the freezer. They can last for up to three months, but I doubt they’ll stick around that long, as they tend to disappear quickly once the family gets a taste!
Can I freeze DIY Frozen Pumpkin Bites?
Absolutely! That’s the beauty of these bites. Once they’ve cooled completely, transfer them to an airtight container or freezer bag, layering with parchment paper to avoid sticking, and store them in the freezer for easy access whenever you crave a warm, flavorful snack.
Conclusion
If you’re like me and cherish the simplicity of homemade goodness, I encourage you to give these DIY Frozen Pumpkin Bites a try. Each batch brings a whirlwind of warmth, nostalgia, and joy to your kitchen—a perfect little treat you can pull from the freezer anytime you need a dose of happiness. There’s truly something comforting about sharing food made with love, and trust me, you’ll want to make this again and again. Enjoy the experience and watch as they become a cherished favorite in your home, just as they have in mine!
Print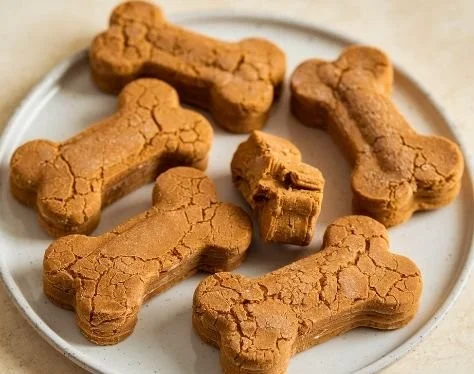
DIY Frozen Pumpkin Bites
Delightful frozen pumpkin bites with a balance of sweetness and warm spices, perfect for any occasion.
- Total Time: 55 minutes
- Yield: 24 servings
Ingredients
- 2 cups Pureed pumpkin (freshly roasted or canned)
- 1/2 cup Maple syrup or honey
- 1 tsp Cinnamon
- 1/2 tsp Nutmeg
- 1/4 tsp Salt
- 1 1/2 cups Rolled or quick oats
- 1/2 cup Almond or peanut butter
Instructions
- Preheat your oven to 350°F (175°C).
- If using fresh pumpkin, cut it open, remove the seeds, and roast it face down on a baking sheet for about 40 minutes or until soft.
- In a mixing bowl, combine the pureed pumpkin, oats, nut butter, chosen sweetener, and spices. Mix until well combined and slightly sticky.
- Using a melon baller or your hands, scoop out small portions and roll them into bite-sized balls. Place on a lined baking sheet.
- Bake for 15-20 minutes or until they slightly firm up and turn golden.
- Let them cool and freeze on a sheet for a couple of hours before transferring to an airtight container.
Notes
For a lighter version, swap nut butter for applesauce or yogurt. Adjust sweeteners as preferred.
- Prep Time: 15 minutes
- Cook Time: 40 minutes
- Category: Dessert
- Method: Baking
- Cuisine: American
- Diet: Gluten-Free, Dairy-Free