Ah, it feels like just yesterday when I first decided to whip up a batch of Tuna Dog Treats for my beloved furry friend, Max. I remember the sun shining through my kitchen window, casting a warm glow over the counter. The aroma of fresh tuna, mixed with a hint of garlic, filled the air, creating an enchanting atmosphere that made my heart swell with joy. I had recently read about the incredible health benefits of tuna for dogs, and I could almost see Max’s wagging tail from the corner of my eye, eager for a taste of his own homemade delights.
As I carefully combined the flavorful ingredients, I felt like I was not just preparing treats for Max but also crafting a joyful experience that would deepen our bond. Each cut, each stir, brought memories of my grandmother into my heart, reminding me that cooking is more than just about nourishment; it’s about showing love. When those scent-filled Tuna Dog Treats finally came out of the oven, golden brown and utterly irresistible, I knew I had created something special. Seeing Max devour them with sheer delight was the cherry on top, proving that these treats were not just satisfying for my pup but also a labor of love.
Now, let’s talk about how you can share this same joy with your furry companions!
Flavor and Popularity
The Unique Flavor Profile of Tuna Dog Treats
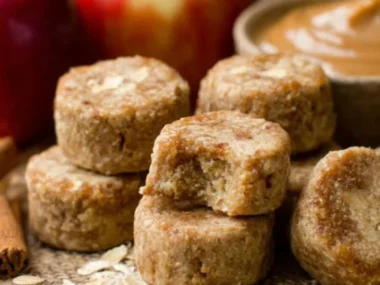
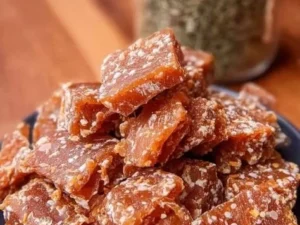
When you think about Tuna Dog Treats, the first thing that comes to mind is that delightful, ocean-fresh aroma. Tuna is known for its strong umami flavor, which tantalizes not only our taste buds but also those of our canine friends. With its rich, buttery texture, tuna can easily take center stage in any homemade dog treat recipe, providing a meal that’s not only delicious but also packed with nutrients.
A sprinkle of garlic or a touch of parsley can elevate these treats even further, blending beautifully with the tuna’s natural flavor and adding a bit of earthy depth. This unique combination makes Tuna Dog Treats a universally loved snack among dogs, as the flavors mingle to create something truly scrumptious. Dogs, with their powerful sense of smell, are naturally drawn to the scent of fresh tuna, making this treat an irresistible temptation even for the pickiest of eaters.
Why This Recipe Is a Family Favorite and Crowd-Pleaser
These Tuna Dog Treats have become a staple in my household—not just for Max, but for every pup that visits! There’s something about watching them perk up at the sight of these treats that warms my heart. Save for my infamous garlic mushrooms, these have quickly become a crowd-pleaser among the four-legged family members.
What’s also wonderful is how simple they are to prepare. No complex processes or fancy ingredients are required; just a handful of pantry staples can turn into something your beloved pet will truly savor. Plus, these treats are fantastic for special occasions or just a regular Tuesday afternoon when you want to give your pup a little extra love. The joy they bring isn’t limited to my four-legged friends; the experience of making them often surprises my human guests, who can’t believe how easy and fun it is to create a batch of wholesome treats.
Ingredients and Preparation
Essential Ingredients and Possible Substitutions
To make Tuna Dog Treats, gathering the right ingredients is key. Here’s what you’ll need:
- Canned Tuna: Use a high-quality canned tuna in water (don’t go for oil unless it’s the only option; oil can sometimes upset dogs’ stomachs).
- Whole Wheat Flour: This forms the base of the treats. You can use oat flour or brown rice flour for a gluten-free alternative.
- Egg: Acts as a binder, ensuring your treats hold together well.
- Garlic (optional): Just a pinch can add flavor, but know some dogs are sensitive, so use sparingly.
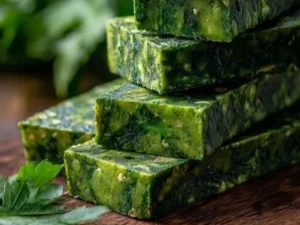
- Parsley: A dash brings freshness and aids digestion, making it a great complementary addition.
- Water: This helps bring the dough together, creating the right consistency for rolling out and cutting shapes.
If you’re experimenting in the kitchen, consider other flavor enhancements such as adding shredded carrots or even some peanut butter for a touch of sweetness, which dogs adore!
Step-by-Step Recipe Instructions with Tips
- Preheat the Oven: Set your oven to 350°F (175°C) and line a baking sheet with parchment paper. This will keep your treats from sticking and make clean-up a breeze.
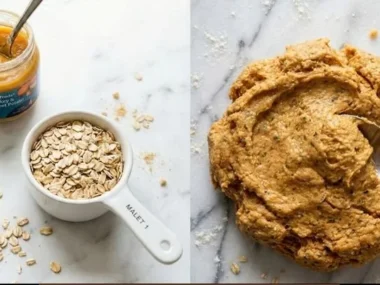
- Combine the Ingredients: In a bowl, mix the canned tuna (drained), egg, and garlic, if using, until well combined.
- Incorporate Flour: Gradually add the whole wheat flour and mix until a dough forms. If it feels too sticky, add a little extra flour until it reaches the perfect texture.
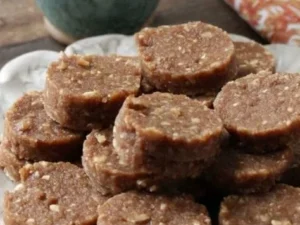
- Roll Out the Dough: Dust your work surface with a bit of flour and roll out the dough to about 1/4 inch thick.
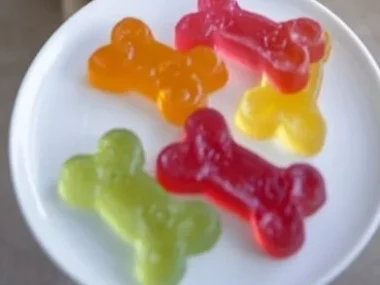
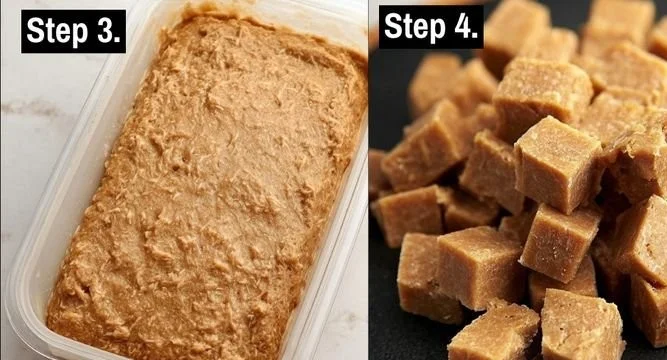
- Cut into Shapes: Use cookie cutters to create fun shapes or simply cut them into squares if you’re in a hurry.
- Bake the Treats: Place the cut-outs on your baking sheet and bake for about 20-25 minutes, or until golden brown. Make sure they’re hard; softer treats won’t last as long!
- Cool and Store: Allow them to cool completely before storing them in an airtight container.
With these instructions, you’ll have a batch of Tuna Dog Treats that the pups will love! Feel free to experiment and make variations; cooking together is all about having fun.
Cooking Techniques and Tips
How to Cook Tuna Dog Treats Perfectly
Cooking Tuna Dog Treats doesn’t require a culinary degree—just a bit of patience and love. To ensure your treats come out perfectly every time, remember a few simple techniques. Always ensure that your tuna is well-drained; excess moisture can lead to soggy treats. When rolling out the dough, a light dusting of flour on your workspace will help prevent sticking. Lastly, be vigilant while baking; every oven is different, so checking for that golden-brown hue is key.
Common Mistakes to Avoid
One common mistake is overbaking the treats. While you want them to be hard enough to store well, an overcooked treat can become too brittle and break apart too easily. Keep an eye on the oven! Another pitfall is using low-quality ingredients. Remember, our furry friends deserve the best; opt for premium tuna without unnecessary additives or preservatives to ensure you’re treating your dog right.
Health Benefits and Serving Suggestions
Nutritional Value of Tuna Dog Treats
Tuna Dog Treats are not only tasty, but they also pack a nutritional punch. Tuna is rich in omega-3 fatty acids, which are essential for healthy skin and coat. It also benefits your dog’s immune system and overall wellness. The eggs provide protein and aid in a strong, healthy body.
By combining these ingredients, you create a balanced treat that’s low in calories but high in enjoyment, making it a guilt-free way to bond with your pet. The addition of parsley can help with bad breath and support digestion, truly making these treats a wholesome indulgence.
Best Ways to Serve and Pair This Dish
When serving Tuna Dog Treats, you can let your dog savor them on their own for a special snack, or you can incorporate them into a feeding routine. Crumble a few treats on your pup’s regular food for an added boost of flavor and excitement. You may also pair them with a refreshing drink of water or a homemade broth, especially during hot summer days, for an extra treat your furry friend will love.
FAQ Section
What type of mushrooms are best for Tuna Dog Treats?
While mushrooms can be a great addition to human meals, it’s best to omit them from dog treats. Certain mushrooms can be toxic to dogs. Instead, focus on safe ingredients like tuna, egg, and parsley that maximize flavor and nutrition.
Can I use dried garlic instead of fresh?
You can, but be cautious with the amount! Dried garlic is more concentrated than fresh garlic, so a smaller quantity will suffice. Keep in mind that some dogs may be sensitive to garlic altogether, so it’s wise to skip it if you’re unsure.
How do I store leftover Tuna Dog Treats?
Store your Tuna Dog Treats in an airtight container at room temperature for up to a week. If you want them to last longer, consider refrigerating them for up to two weeks, or freezing them for several months.
Can I freeze Tuna Dog Treats?
Absolutely! Freezing is a great way to prolong the shelf life of these treats. Just ensure they are completely cool before placing them in a freezer-safe bag or container. When you’re ready to use them, simply thaw at room temperature or give them a quick zap in the microwave.
Closing my time in the kitchen with you has been such a joy, and I hope you feel inspired to create some delightful Tuna Dog Treats for your canine companion. If you’re like me, you know that food is a way to connect and show love. There’s something comforting about preparing homemade treats that are as special and full of love as the furry friends we are honored to share our lives with. Trust me, you’ll want to make this again and again, strengthening that bond through food, one treat at a time!
Print
Tuna Dog Treats
Delicious and nutritious homemade tuna dog treats that your furry friend will love.
- Total Time: 35 minutes
- Yield: 12 servings
Ingredients
- 1 can high-quality tuna in water, drained
- 1 cup whole wheat flour (or oat flour for gluten-free)
- 1 egg
- 1/2 teaspoon garlic (optional)
- 1 tablespoon parsley, chopped
- 1/4 cup water
Instructions
- Preheat the oven to 350°F (175°C) and line a baking sheet with parchment paper.
- Combine the canned tuna (drained), egg, and garlic (if using) in a bowl until well mixed.
- Incorporate the whole wheat flour gradually and mix until a dough forms.
- Roll out the dough on a floured surface to about 1/4 inch thick.
- Cut into shapes using cookie cutters or into squares.
- Bake for about 20-25 minutes, or until golden brown and hard.
- Cool completely before storing in an airtight container.
Notes
Be careful not to overbake the treats; check for that golden brown hue.
- Prep Time: 10 minutes
- Cook Time: 25 minutes
- Category: Dog Treats
- Method: Baking
- Cuisine: Pet Food
- Diet: Pet-friendly