It was a cool autumn afternoon in Asheville, and the scent of spices wafted through my kitchen while I prepared a pot of homemade doggy breath treats. I remember the first time I made these delights; my golden retriever, Max, eagerly watched me from a distance, his big eyes sparkling with anticipation. I chuckled at his adorable struggle to contain his excitement as I mixed and rolled the dough. Every scoop of fresh parsley, every sprinkle of garlic felt magical. Though they were simply treats meant to freshen his breath, they carried the loving touch of homemade goodness that reminded me of the heartfelt meals my grandmother used to whip up in her own bustling kitchen.
As I shaped the treats into delightful little bones, the warmth and love I felt for Max filled the room. The joy of sharing something I created with my own hands, knowing it nourished him and kept those puppy kisses sweet, was beyond words. It wasn’t just about making a doggy snack; it was about crafting a bond, one homemade treat at a time.
Flavor and Popularity
The Unique Flavor Profile of Homemade Doggy Breath Treats
Homemade doggy breath treats boast a flavor profile that’s a delightful mix of savory and herbaceous notes. With the combination of fresh parsley and a hint of garlic, they add that zesty kick that dogs adore. The unmistakable umami flavor from the garlic contrasts beautifully with the buttery texture of the dough, creating an irresistible offering for our furry friends. Plus, you can take comfort in knowing that every ingredient is healthy and handpicked for your pooch.
The freshness of herbs makes these treats not only palatable but enriching too. Just picture your dog wagging their tail in anticipation; each treat brings a balance of earthy flavors and the excitement of knowing they’re about to enjoy something special. It’s no secret why these homemade goodies have quickly become a family favorite among dog lovers everywhere!
Why This Recipe Is a Family Favorite and Crowd-Pleaser
When I first introduced these homemade doggy breath treats to my friends and their pets during a weekend doggy playdate, I knew I was onto something. As the treats baked in the oven, the tantalizing aroma had all the pups on high alert, their noses twitching as they sniffed the air. It quickly became a scene of pure joy as each dog reveled in the taste of these crunchy bites while their owners delighted in knowing they were serving up wholesome, clean snacks.
Now, they’re often a part of our get-togethers, and I even enjoy making a double batch to share. It’s a simple way to spread the love—not just to our dogs but also to their humans, fostering connection over the shared delight of four-legged companions. Trust me: once your dog tries these treats, you’ll find yourself making them again and again.
Ingredients and Preparation
Essential Ingredients and Possible Substitutions
To create delightful homemade doggy breath treats, gather these essential ingredients:
- Whole wheat flour: This sturdy base gives the treats the right texture. You can swap it with oat flour or gluten-free flour if your dog has sensitivities.
- Fresh parsley: Both a breath freshener and a source of vitamins, parsley is packed with nutrients. If fresh isn’t available, dried parsley will work too, but in smaller quantities.
- Garlic: A small amount adds flavor and has antibacterial properties, but let’s not go overboard; too much garlic can be harmful to dogs.
- Egg: Acts as a binder, providing structure to the treats. An alternative for a vegan version would be a flaxseed meal mixed with water.
- Water: For combining ingredients, consider using low-sodium chicken or beef broth for added flavor.
Here’s a tip: If you’re out of any one ingredient, get creative! You can use pumpkin puree for a seasonal touch or peanut butter for a flavor that dogs can’t resist. Each variation leads to unique treats.
Step-by-Step Recipe Instructions with Tips
Let’s get baking! Here’s how to make these homemade doggy breath treats:
- Preheat your oven to 350°F (175°C).
- In a large mixing bowl, combine 2 cups of whole wheat flour, 1/2 cup of finely chopped fresh parsley, and 2 tablespoons of minced garlic.
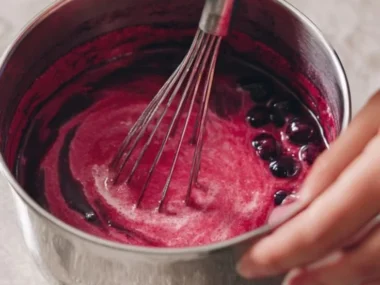
- In another bowl, whisk together one egg and 1/2 cup of water (or broth).
- Create a well in your dry ingredients, then pour in the wet mix. Stir until everything comes together in a shaggy dough.
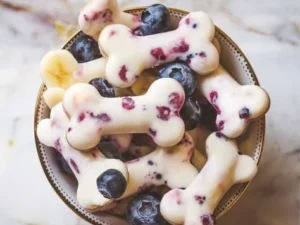
- Turn out the dough onto a floured surface. Knead lightly until it forms a smooth ball. Roll it out to about 1/4 inch thick, and use cookie cutters to shape the treats—little bones or any fun shape you have will work!
- Place the treats on a parchment-lined baking sheet and bake for 20-25 minutes, or until golden and firm to the touch.
- Allow them to cool completely before serving to your furry friend.
Here’s a little tip: You can experiment with the thickness of the treats. Thicker ones will be softer while thinner ones will be crunchier—find what your dog enjoys the most!
Cooking Techniques and Tips
How to Cook Homemade Doggy Breath Treats Perfectly
Cooking homemade doggy breath treats is all about paying attention to the texture. Overbaking can leave them hard as rocks, and underbaking might make them chewy. Keep an eye on them to ensure they reach that golden-browning stage without sacrificing the munchable goodness.
Also, let me share a little secret: If your dog loves to chew, consider adding a softening agent like mashed banana or sweet potato to the dough! Mixing it in can yield a different but delightful treat filled with goodness.
Common Mistakes to Avoid
While it’s straightforward to whip up these treats, there are a few common pitfalls:
-
Overusing garlic: Always remember, moderation is key. While a sprinkling enhances flavor, too much can be harmful. Stick closely to the recipe until you understand how your dog reacts.
-
Not considering allergies: Always be aware of your dog’s dietary restrictions. Consult your vet if you’re unsure about new ingredients.
-
Skipping cooling time: It’s tempting to see your dog dive into those warm treats, but letting them cool ensures a safe and crisper snack!
Health Benefits and Serving Suggestions
Nutritional Value of Homemade Doggy Breath Treats
These homemade doggy breath treats not only keep tails wagging but also boast a host of health benefits. Fresh parsley offers antioxidants, aids digestion, and serves as a natural breath freshener. Garlic, in moderation, supports heart health and can fend off pests. Add in nutrients from egg and the wholesome goodness of whole wheat flour, and you have a treat that contributes to your dog’s overall well-being.
Serving these treats regularly can lead to fresher breath and healthier smiles! You’ll appreciate the peace of mind that comes with knowing you’re giving them something wholesome instead of store-bought snacks packed with additives.
Best Ways to Serve and Pair This Dish
These treats stand beautifully on their own, but here are some joyful serving suggestions:
-
For Training: Crumble the treats as high-value rewards during training sessions. Their aroma makes them irresistible to sit and stay for!
-
With Dogs’ Meals: Crumble the treats over your dog’s dinner as a special topping for a treat that’s both tasty and intriguing.
-
Sharing with Friends: When inviting fellow dog-parents over, wrap a bag of these treats as a lovely hostess gift!
What type of mushrooms are best for Homemade Doggy Breath Treats?
In this recipe, mushrooms don’t play a role since the focus is on herbs like parsley and garlic. If you are looking to include some for a different treat, opt for varieties like shiitake or cremini, but always be cautious and avoid any mushrooms known to be toxic to dogs.
Can I use dried garlic instead of fresh?
It’s best to stick with fresh garlic in your homemade doggy breath treats. Dried garlic lacks the moisture and can be quite potent, making it easy to inadvertently use too much. Use fresh whenever you can, but if you must substitute, do so sparingly!
How do I store leftover Homemade Doggy Breath Treats?
Store leftover treats in an airtight container. They will last about a week at room temperature but can also be refrigerated for extended freshness up to two weeks. If you want to keep them even longer, you can store them in the freezer for up to three months.
Can I freeze Homemade Doggy Breath Treats?
Absolutely! Freezing is a great way to ensure these treats are always on hand for your furry friend. Just place them in a resealable bag or container, and they’ll be ready to thaw whenever you need to treat your pup!
As I wrap up this post, I truly hope you take the time to make homemade doggy breath treats for your furry companions. If you’re like me, watching their happy faces savor each bite will warm your heart like nothing else. There’s something comforting about sharing a little love and homemade goodness, even when that love is found in a simple dog treat. Trust me; you’ll want to make this recipe again and again. Your pooch deserves it!
Print
Homemade Doggy Breath Treats
Delightful homemade treats that freshen your dog’s breath with parsley and garlic, crafted with love and care.
- Total Time: 40 minutes
- Yield: 20-25 treats
Ingredients
- 2 cups whole wheat flour
- 1/2 cup finely chopped fresh parsley
- 2 tablespoons minced garlic
- 1 egg
- 1/2 cup water (or low-sodium broth)
Instructions
- Preheat your oven to 350°F (175°C).
- Combine whole wheat flour, parsley, and garlic in a large mixing bowl.
- Whisk together the egg and water (or broth) in another bowl.
- Create a well in the dry mix and pour in the wet ingredients. Stir until you form a shaggy dough.
- Knead the dough lightly on a floured surface to form a smooth ball.
- Roll it out to about 1/4 inch thick, then use cookie cutters to shape the treats.
- Place the shaped treats on a parchment-lined baking sheet.
- Bake for 20-25 minutes, until golden and firm.
- Allow to cool completely before serving.
Notes
You can swap ingredients like flour and parsley based on availability. Be cautious with garlic quantity to ensure safety for your dog.
- Prep Time: 15 minutes
- Cook Time: 25 minutes
- Category: Dog Treat
- Method: Baking
- Cuisine: American
- Diet: Dog-friendly