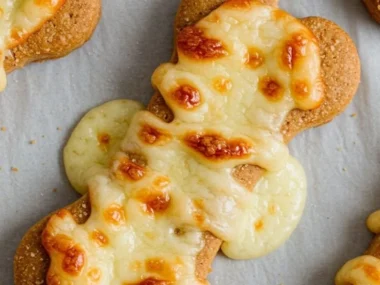
There I was, standing in my cozy kitchen in Asheville, surrounded by the intoxicating aromas of herbs and wholesome baking. I was on a mission—a mission fueled by love for a furry friend who never hesitated to greet me with a wagging tail and an endless supply of doggy kisses. That’s when I decided to venture into the world of making homemade dog dental sticks. My heart swelled with joy at the thought of crafting a treat that would not only please my pup but also contribute to his dental health.
The memory of my childhood immediately popped into my mind. I remembered watching my grandmother whip up treats for her own pack of dogs, all while sharing stories of the joy they spread. As I mixed the dough, I could almost hear her warm voice guiding me, reminding me to keep the ingredients simple and wholesome, just as she had taught me. The first bite of those homemade dog dental sticks was a symphony of crunchy goodness, and my dog couldn’t contain his excitement, bouncing around the kitchen like a little kid. It wasn’t just a treat; it was a heartfelt creation that brought us closer together, celebrating the bond I had with my canine companion.
Flavor and Popularity
The Unique Flavor Profile of Homemade Dog Dental Sticks
Creating homemade dog dental sticks goes beyond just mixing flour and water. You can infuse your sticks with delightful flavors that dogs go crazy for. Think of ingredients like sweet potato, peanut butter, or pumpkin—the possibilities are truly endless. These flavors, combined with herbs like parsley, not only make these treats scrumptious but also add fresh, earthy undertones that dogs are bound to love.
Sweet potatoes provide a natural sweetness that dogs find irresistible, while peanut butter brings a nutty richness that complements the overall flavor profile. The crunchiness of the sticks contributes to an engaging texture that not only satisfies their chewing instincts but serves as an effective way to clean their teeth. Imagine the joyful tail wags as they savor each bite, knowing they’re indulging in something both delicious and nutritious.
Why This Recipe Is a Family Favorite and Crowd-Pleaser
In my household, homemade dog dental sticks are a hit not only with my dog but with friends and family as well. Each time I whip up a batch, I find joy in hearing stories about how other pet owners’ dogs react. It’s as if I’ve created a little community of happy dogs and grateful owners, all united by this simple recipe.
The beauty of these sticks lies in their versatility. You can adapt the recipe to cater to various dietary restrictions or preferences—whether your dog is grain-free or has a penchant for certain flavors, customizing the ingredients can make this treat a success story every single time.
Ingredients and Preparation
Essential Ingredients and Possible Substitutions
To make those homemade dog dental sticks, you’ll want to gather a mix of wholesome ingredients that are safe for our furry friends. Here’s what I recommend:
- Whole wheat flour (or almond flour for a grain-free option): This serves as your base and provides a hearty texture.
- Peanut butter (unsweetened and xylitol-free): The star ingredient that gives these sticks a flavor dogs crave.
- Sweet potato puree: Adds moisture and natural sweetness. You can also substitute with pumpkin puree for a similar effect.
- Egg: This binds everything together and provides nutrition.
- Fresh parsley: An often-overlooked herb that not only adds flavor but can help freshen your dog’s breath.
- Broth: Chicken or beef, low-sodium and free from additives, enhances the flavor.
Substitutions are easy! If you don’t have peanut butter on hand, almond butter gives a different twist. And if you’re out of parsley, feel free to get creative with other dog-friendly herbs like basil or mint—just a hint will do!
Step-by-Step Recipe Instructions with Tips
Making homemade dog dental sticks is both simple and enjoyable. Here’s how you can do it:
-
Preheat Your Oven: Start by preheating your oven to 350°F (175°C). It helps to have everything ready for baking.
-
Mix Dry Ingredients: In a large bowl, combine the whole wheat flour and any optional ground herbs. Whisk until well mixed.
-
Blend Wet Ingredients: In another bowl, combine the peanut butter, sweet potato puree, egg, and broth. Mix these ingredients until they form a smooth mixture.
-
Combine: Gradually add the wet mixture to the dry ingredients. Stir until a dough forms. If the mixture seems too dry, you can add a little more broth until it reaches a workable consistency.
-
Roll Out: On a floured surface, roll out the dough to about ¼ inch thick. Use cookie cutters or simply cut into strips to create your ideal shape.
-
Bake: Place your shaped treats onto a parchment-lined baking sheet. Bake for approximately 30-35 minutes, or until they turn golden brown. Remember, the thicker they are, the longer they’ll need!
-
Cool Down: Allow your homemade dog dental sticks to cool completely before sharing them with your pup. This ensures they harden properly and are safe to chew.
Now, it’s time to watch those tails wag! Feel free to store leftovers in an airtight container at room temperature for up to a week or in the fridge for even longer shelf life.
Cooking Techniques and Tips
How to Cook Homemade Dog Dental Sticks Perfectly
To ensure every batch of homemade dog dental sticks turns out golden and crunchy, pay attention to your baking process. Always make sure your oven preheats thoroughly and that you monitor the baking closely in the last few minutes. The last thing you want is overbaked sticks that turn rock-hard. A toothpick test can help—if it comes out clean, your sticks are just right!
Common Mistakes to Avoid
One common mishap is not measuring ingredients accurately. When cooking for dogs, consistency is key to avoid any potential gluten issues or other digestive disturbances. It’s best to avoid adding ingredients like salt or sugar, as they are not necessary and could be harmful. Lastly, ensure the treats have cooled completely, as warm sticks can become soft and chewy rather than nice and crunchy.
Health Benefits and Serving Suggestions
Nutritional Value of Homemade Dog Dental Sticks
Every ingredient in these homemade dog dental sticks plays a vital role in your dog’s well-being. Whole wheat flour provides fiber, which supports a healthy digestion. Sweet potatoes are loaded with vitamins A, C, and B6, plus essential minerals such as potassium and manganese. Meanwhile, peanut butter offers protein, healthy fats, and vitamins to keep your pup energized.
Adding parsley not only enhances the taste, but also provides essential vitamins and antioxidants that support overall health. The combination of these ingredients creates a nutritious treat that helps promote dental health while satisfying your dog’s chewing needs—a true win-win!
Best Ways to Serve and Pair This Dish
When you present these homemade dog dental sticks to your pup, consider taking a moment to celebrate the occasion! Maybe start a little ritual, like offering a stick after a play session or during training. Not only does it reinforce good behavior, but it also helps regulate their energy levels throughout the day.
If you’re feeling extra fancy, you can serve the sticks with a side of homemade bone broth as a dipping sauce—your dog will think they’ve hit the jackpot!
FAQ Section
What type of mushrooms are best for Homemade Dog Dental Sticks?
While mushrooms aren’t a common ingredient in traditional dog dental sticks, if you’re looking to add flavor, opt for dog-safe varieties like button mushrooms. Avoid using any wild or toxic mushrooms, as they can be harmful.
Can I use dried garlic instead of fresh?
Garlic can be toxic to dogs in significant amounts, so it’s best to avoid using it altogether, even in dried form. Instead, consider incorporating safe herbs like parsley for added flavor and health benefits.
How do I store leftover Homemade Dog Dental Sticks?
Store your leftover treats in an airtight container at room temperature for about a week. You may also keep them in the fridge to extend their freshness.
Can I freeze Homemade Dog Dental Sticks?
Absolutely! Freezing the homemade dog dental sticks is a great option. Just ensure they are completely cooled and stored in a freezer-safe bag or container. They can stay fresh for several months.
Conclusion
If you’re like me, making homemade dog dental sticks not only nourishes our furry friends but also fills our hearts with joy. There’s something comforting about creating something from scratch, knowing exactly what goes into these treats. My little baking adventure transformed into a wholesome tradition that brings laughter and wagging tails into my home. Trust me, you’ll want to make this again and again. So grab your measuring cups, roll up your sleeves, and let’s make some delicious goodies for your beloved pup!
Print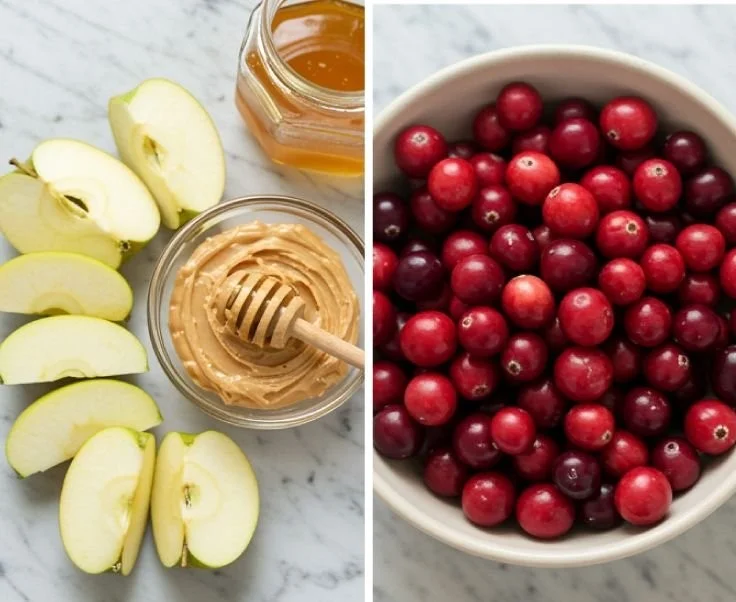
Homemade Dog Dental Sticks
A wholesome recipe for homemade dog dental sticks that promotes dental health and is packed with flavor
- Total Time: 50 minutes
- Yield: 20 servings
Ingredients
- 2 cups whole wheat flour (or almond flour for a grain-free option)
- 1/2 cup peanut butter (unsweetened and xylitol-free)
- 1/2 cup sweet potato puree (or pumpkin puree)
- 1 egg
- 1/4 cup fresh parsley, chopped
- 1/4 cup low-sodium chicken or beef broth
Instructions
- Preheat your oven to 350°F (175°C).
- Mix dry ingredients in a large bowl.
- Blend wet ingredients in another bowl until smooth.
- Combine the wet mixture with the dry ingredients until a dough forms.
- Roll out the dough to about ¼ inch thick on a floured surface.
- Cut into desired shapes using cookie cutters or strips.
- Bake for 30-35 minutes, or until golden brown.
- Cool completely before serving to your pup.
Notes
Store in an airtight container at room temperature for up to a week or in the fridge for longer shelf life. Can be frozen for months.
- Prep Time: 15 minutes
- Cook Time: 35 minutes
- Category: Dog Treats
- Method: Baking
- Cuisine: Pet Cuisine
- Diet: Dog-Friendly