As the sun began to rise over the Blue Ridge Mountains, painting the sky in shades of orange and pink, I found myself in the kitchen, enveloped by the comforting aroma of honey and peanut butter. It was my first attempt at making homemade dog biscuits, a labor of love for my beloved golden retriever, Charlie. I remember looking down at his eager eyes, his tail wagging with excitement as if he could smell the deliciousness brewing. That was the moment I decided to create my very own batch of Homemade Dog Biscuits: A Tail-Wagging Treat Recipe.
Stirring the ingredients felt like a dance, each step bringing memories of baking with my grandmother. I could almost hear her voice guiding me, teaching me that cooking is about joy, love, and the happiness you share. These biscuits weren’t just treats; they were tokens of affection, carefully crafted to show Charlie just how much he meant to me. With each knead of the dough, I handled it gently, thinking about how much he would enjoy these tasty delights. And when I pulled the golden-brown biscuits from the oven, their crunchy texture and savory aroma made them irresistible—not just to Charlie but to me, too! It was a simple pleasure, creating something so delightful for my four-legged friend, forming a bond that transcended words.
Flavor and Popularity
The Unique Flavor Profile of Homemade Dog Biscuits: A Tail-Wagging Treat Recipe
The charm of Homemade Dog Biscuits: A Tail-Wagging Treat Recipe lies in its simplicity and adaptability. The base ingredients, often peanut butter and flour, create a buttery, nutty profile that tantalizes tails and nostrils alike. When we add a touch of honey, it enhances the sweetness, making each bite a little celebration. Some may choose to incorporate chicken broth or pureed pumpkin for extra flavor. The beauty of this recipe is the freedom to play with flavors and ingredients to suit your pup’s palate.
Imagine the buzz your kitchen will hum with as the delightful scent of baking treats wafts through the air! The mix of wholesome ingredients provides a warmth, reminiscent of family gatherings and cozy evenings. Each batch can take on a unique flavor depending on the additions you choose — think of herbs or spices that offer an earthy undertone. And when you present these biscuits, the joy radiating from your furry friend feels like the finest reward.
Why This Recipe Is a Family Favorite and Crowd-Pleaser
These biscuits aren’t just a hit with the dogs; they have become a go-to treat when I have friends over with their pets, too. Each time I whip up a batch of Homemade Dog Biscuits: A Tail-Wagging Treat Recipe, I know I’m not only feeding dogs; I’m bringing people together. There’s a sense of community in sharing homemade treats, where stories are exchanged over wagging tails and happy barks.
As we gather around, watching our pets play and enjoy their snacks, it’s clear that these little goodies unite us all. The laughter and chatter in the room become as sweet as the biscuits themselves, sparking conversations about puppy antics and favorite flavors. For friends and family alike, these treats serve as a delightful introduction to the loving bond shared between humans and their furry companions.
Ingredients and Preparation
Essential Ingredients and Possible Substitutions
To prepare these Homemade Dog Biscuits: A Tail-Wagging Treat Recipe, you’ll need a few essential ingredients:
- Peanut Butter: Use creamy, unsweetened, and unsalted peanut butter to ensure it’s safe for your pup.
- Whole Wheat Flour: This provides structure and flavor; however, you can substitute with oat flour or a gluten-free blend if needed.
- Honey: A natural sweetener that adds moisture. You could swap this for applesauce or mashed banana for a lower sugar option.
- Egg: It acts as a binder, helping hold everything together. You can use a flax egg for a vegan version.
- Chicken or Vegetable Broth: This can be adjusted according to your dog’s preferences, adding depth to the flavor.
Customization can turn these dog biscuits into your pup’s favorites! Try adding pureed pumpkin for October treats or shredded carrots to provide a little crunch. Each ingredient brings a different twist.
Step-by-Step Recipe Instructions with Tips
Creating these treats is a straightforward process that even novice bakers can master! Here’s how to make your Homemade Dog Biscuits: A Tail-Wagging Treat Recipe:
- Preheat your oven to 350°F (175°C) and prepare a baking sheet lined with parchment paper.
- In a large bowl, mix 2 cups of whole wheat flour, 1 cup of peanut butter, 1/2 cup of chicken broth, and 1/4 cup of honey until it forms a cohesive dough.
- If the dough is too sticky, use a little extra flour to help mold it.
- Lightly flour your surface and roll out the dough to about 1/4-inch thickness. Use cookie cutters to cut into fun shapes—stars or bones, maybe!
- Place the cut-outs on the prepared baking sheet and bake for 20-25 minutes until they’re golden brown.
- Allow them to cool completely before serving. Store in an airtight container for up to two weeks.
For added benefit, sprinkle a little cinnamon or parsley into the mix. These not only enhance flavor but also bring in extra nutritional value.
Cooking Techniques and Tips
How to Cook Homemade Dog Biscuits: A Tail-Wagging Treat Recipe Perfectly
The key to crafting the perfect Homemade Dog Biscuits: A Tail-Wagging Treat Recipe lies not just in the ingredients but also in the cooking technique. To achieve that delightful crunch, ensure your oven is fully preheated before placing the biscuits inside. A consistently heated oven promotes even baking, allowing the edges to crisp beautifully while maintaining a tender center.
Monitor their progress after the 20-minute mark, as ovens may vary slightly. If you want to ensure a heartier biscuit, leave them in for a few more minutes. A golden hue is your best indicator! Once baked, let them cool down on a wire rack to maintain their crunch.
Common Mistakes to Avoid
Even the most seasoned bakers can stumble when creating pet treats! One common pitfall is underestimating the power of measurement. Using too much liquid can yield chewy, softer biscuits, while not enough will make them crumby. Always measure carefully!
Furthermore, avoid using ingredients harmful to dogs. Things like raisins, chocolate, or excessive salt should never make their way into your pup’s snacks. Keeping it simple yet wholesome ensures a safe and tasty treat. And remember, consistency in thickness while cutting shapes leads to uniform baking!
Health Benefits and Serving Suggestions
Nutritional Value of Homemade Dog Biscuits: A Tail-Wagging Treat Recipe
These Homemade Dog Biscuits: A Tail-Wagging Treat Recipe are more than just a fun snack; they also promote various health benefits for your pup! Peanut butter is an excellent source of protein and healthy fats, perfect for providing energy. Whole wheat flour adds fiber, which helps maintain a healthy digestive system.
Additionally, swapping honey for pureed pumpkin, for example, can increase fiber intake and promote better gut health. These wholesome ingredients work together, ensuring every bite is not only tasty but also nourishing for your furry family member.
Best Ways to Serve and Pair This Dish
When it comes to serving Homemade Dog Biscuits: A Tail-Wagging Treat Recipe, the excitement in your dog’s eyes is half the joy! You can offer these biscuits as a reward during training, a snack during play, or even as a special treat during family gatherings. Consider pairing them with a cozy evening snuggle on the couch, reminiscing about delightful memories shared with your pup.
For gatherings, place a few on a decorative platter for your guests’ furry friends to enjoy—everyone loves a good party! And always keep fresh water on hand to keep the tail-wagging continuous.
FAQ Section
What type of mushrooms are best for Homemade Dog Biscuits: A Tail-Wagging Treat Recipe?
While mushrooms can add an interesting twist to dog treats, it’s important to note that not all mushrooms are safe for dogs. If you’re experimenting with mushrooms, stick with common varieties like white or button mushrooms—ensure they’re simply cooked, without added seasonings, before using them.
Can I use dried garlic instead of fresh?
Garlic in any form can be harmful to dogs, and it’s best to avoid it altogether while making treats. Instead, try incorporating bite-sized pieces of sweet potatoes or cooked carrots for natural sweetness without the risks associated with garlic.
How do I store leftover Homemade Dog Biscuits: A Tail-Wagging Treat Recipe?
Keep these delightful snacks stored in an airtight container at room temperature for freshness. They should last for up to two weeks. For longer storage, consider placing them in the refrigerator or freezing them for up to six months.
Can I freeze Homemade Dog Biscuits: A Tail-Wagging Treat Recipe?
Absolutely! Freezing is a great way to extend the life of your treats. After they’ve completely cooled, place them in a resealable zipper bag or an airtight container. Simply thaw and serve when you’re ready to treat your pooch!
Conclusion
If you’re like me and believe that love is best expressed through food—especially for our furry friends—then you’ll want to embark on this journey of making Homemade Dog Biscuits: A Tail-Wagging Treat Recipe. There’s something comforting about rolling out the dough and watching those biscuits turn golden brown, knowing that each one will bring joy and happiness. Trust me, you’ll want to make this again and again, sharing those delicious doggie delights with your companion and friends. So, gather your ingredients and start baking, because a wagging tail deserves a tasty reward!
Print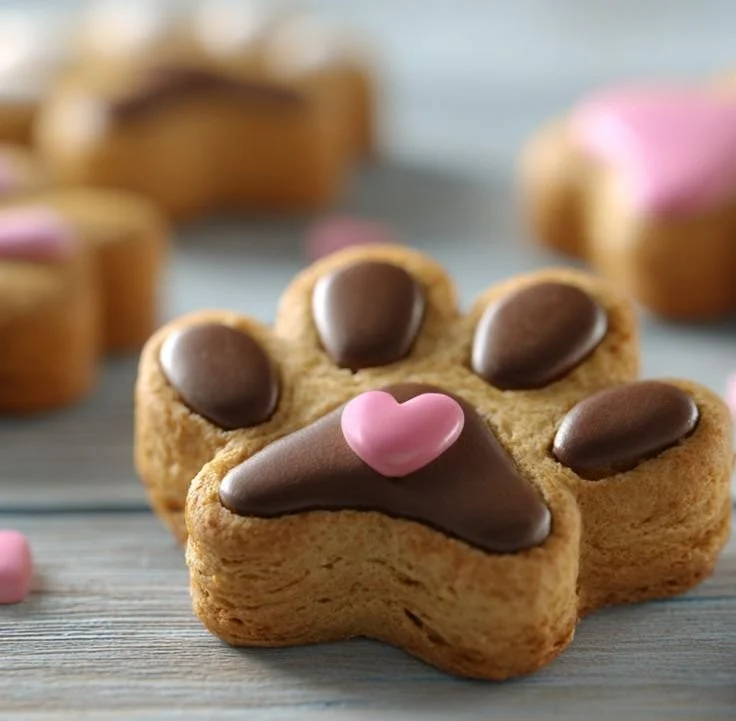
Homemade Dog Biscuits: A Tail-Wagging Treat Recipe
Delicious homemade dog biscuits made with peanut butter and whole wheat flour, perfect for your furry friend!
- Total Time: 40 minutes
- Yield: Batch varies (approximately 24 biscuits)
Ingredients
- 2 cups whole wheat flour
- 1 cup unsweetened, unsalted peanut butter
- 1/2 cup chicken or vegetable broth
- 1/4 cup honey
- 1 egg (or a flax egg for vegan option)
Instructions
- Preheat your oven to 350°F (175°C) and prepare a baking sheet lined with parchment paper.
- In a large bowl, mix the flour, peanut butter, broth, and honey until it forms a cohesive dough.
- If the dough is too sticky, add a little extra flour to help mold it.
- Roll out the dough to about 1/4-inch thickness on a lightly floured surface and cut into shapes with cookie cutters.
- Place the cut-outs on the prepared baking sheet and bake for 20-25 minutes until golden brown.
- Cool completely before serving and store in an airtight container for up to two weeks.
Notes
For added flavor and nutrition, consider adding pureed pumpkin or shredded carrots to the dough!
- Prep Time: 15 minutes
- Cook Time: 25 minutes
- Category: Dog Treats
- Method: Baking
- Cuisine: Dog Food
- Diet: Grain-Friendly