There’s something extraordinary about the bond we share with our furry friends. I remember the first time I decided to whip up a batch of Easy Baked Dog Treats: A Tail-Wagging Snack Recipe for my beloved golden retriever, Daisy. I was inspired by the love that fills our home in Asheville, where my grandmother’s recipes still echo through my kitchen. It was a gray afternoon, and the drizzle outside pushed me to be creative. I gathered simple ingredients, recalling how Daisy’s eyes lit up every time I grabbed a bag of crunchy treats from the store. I wanted to make something special, something made with love rather than commercial ingredients filled with additives. As the sweet aroma of peanut butter and oats filled the air, Daisy hovered expectantly at my feet, tail wagging. When those treats came out of the oven—golden, warm, and inviting—I didn’t just see them as snacks; I saw happiness in Daisy’s eyes. Watching her devour those homemade goodies was pure joy, and I knew then that this Easy Baked Dog Treats recipe would become a cherished tradition in our home.
Flavor and Popularity
The Unique Flavor Profile of Easy Baked Dog Treats: A Tail-Wagging Snack Recipe
When crafting Easy Baked Dog Treats: A Tail-Wagging Snack Recipe, creating a flavor profile that dogs adore is essential. Imagine the warm, nutty scent of peanut butter dancing through your kitchen, harmonizing with the wholesome aroma of oats. These ingredients combine to create a delightful treat that’s not only tasty but also gives your four-legged friends the nutrients they need to stay happy and healthy.
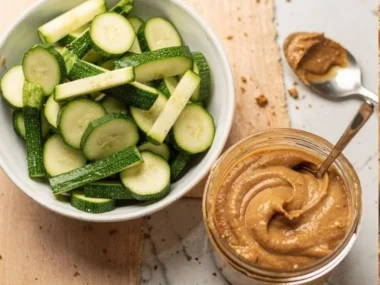
Peanut butter forms the base of this snack, providing a rich, creamy texture that dogs can’t resist. Make sure to choose unsweetened, xylitol-free peanut butter to ensure your pups’ safety while they enjoy their tasty reward. Oats offer a gentle sweetness and a chewy texture that’s satisfying for pups to sink their teeth into. As they bake, these treats turn golden brown, creating an inviting aroma that makes both dogs and humans alike feel at home.
Why This Recipe Is a Family Favorite and Crowd-Pleaser
This recipe has swiftly become a family favorite because it’s not just about creating a dish; it’s about bonding over the joy of giving. My husband, who’s always been a softie for Daisy, enjoys helping mix the ingredients and rolling out the dough. We even let our grandkids join in on the fun! Each family member takes turns cutting the treats into fun shapes, making it a delightful experience filled with giggles and tail wags.
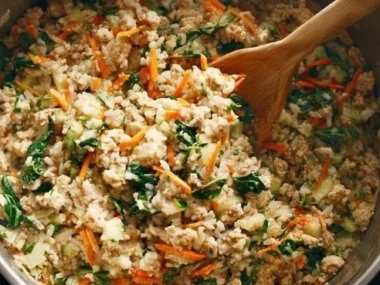
The beauty of these Easy Baked Dog Treats lies in their versatility. Once you nail the basic recipe, the possibilities are endless. Some days, I add shredded carrots or apples for a fruity twist, while on others, I sneak in a little pumpkin puree for added flavor and health benefits. No wonder it’s a hit both at home and at our local dog park where our friends eagerly await the next batch.
Ingredients and Preparation
Essential Ingredients and Possible Substitutions
To make Easy Baked Dog Treats, you will want to gather a few essential ingredients. Here’s what you’ll need:
- Peanut Butter (unsweetened, xylitol-free): The star ingredient that dogs adore.
- Rolled Oats: They provide a chewy texture and are excellent for digestion.
- Whole Wheat Flour: Offers structure—use gluten-free flour if your pup is sensitive.
- Egg: Acts as a binder, ensuring your treats hold together.
- Honey: A natural sweetener that dogs love—feel free to omit for less sweetness.
- Broth or Water: Helps in forming a dough—use low-sodium broth for added flavor.
If you need substitutions, don’t fret! If your dog is allergic to peanut butter, try using pumpkin puree or a non-toxic sun butter for a similar texture. For the flour, you can swap whole wheat with coconut flour to create a grain-free option. Feel free to experiment with different flavors by adding ingredients like mashed bananas, sweet potatoes, or even a pinch of cinnamon!
Step-by-Step Recipe Instructions with Tips
-
Preheat Your Oven: Start by preheating your oven to 350°F (175°C). This ensures that your dog treats will bake evenly and come out perfectly golden.
-
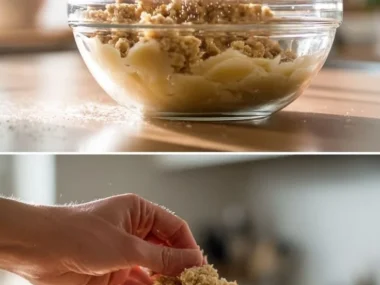
Mix the Wet Ingredients: In a large mixing bowl, combine 1 cup of peanut butter, 1 egg, and 1 tablespoon of honey. Mix them well until smooth.
-
Incorporate the Dry Ingredients: Gradually add 1 cup of rolled oats and 1 cup of whole wheat flour to the wet mixture. Pour in 1/4 cup of broth or water to help your dough come together.
-
Knead the Dough: On a lightly floured surface, knead the dough until it’s cohesive but not sticky. If it’s too dry, add a bit more broth; if it’s too wet, dust with a sprinkle of flour.
-
Roll and Cut: Roll out the dough to about 1/4 inch thick and use cookie cutters to create your desired shapes. Remember, the more fun the shapes, the happier your pups will be!
-
Bake: Place the treats on a parchment-lined baking sheet and bake for about 20-25 minutes, or until they’re golden brown and firm.
-
Cool Down: Once out of the oven, let them cool completely. Trust me, your furry friend will be waiting impatiently!
-
Store Properly: Keep the treats in an airtight container in the fridge for up to a week, or freeze for longer storage.
Cooking Techniques and Tips
How to Cook Easy Baked Dog Treats: A Tail-Wagging Snack Recipe Perfectly
Baking dog treats can be a fun and rewarding experience, but ensuring that they come out just right takes a little know-how. Remember to:
- Preheat the Oven: Always preheating your oven is crucial to achieve that perfectly baked treat.
- Watch the Baking Time: Keep an eye on the treats during the last few minutes of baking to avoid any burnt edges. Each oven is different, and you’ll want them to be golden but not overcooked.
- Use a Parchment Lining: Line your baking sheet with parchment paper to prevent sticking and make cleanup a breeze.
- Let Cool Completely: Allowing the treats to cool fully before storage maintains their crispness.
Common Mistakes to Avoid
When attempting this Easy Baked Dog Treats recipe, here are a few common pitfalls to dodge:
- Using Sweetened Peanut Butter: Be cautious to choose the right peanut butter; many commercial brands contain additives that are harmful to dogs, like xylitol.
- Neglecting Measurements: Accurately measuring your ingredients is vital to creating a balanced treat that holds its shape and texture.
- Ignoring Texture: If your dough is too sticky or too dry, adjust water or flour accordingly; you want it to be manageable and easy to roll out.
- Skipping the Cool Down Phase: Not allowing treats to cool can lead to sogginess—even if they look done!
Health Benefits and Serving Suggestions
Nutritional Value of Easy Baked Dog Treats: A Tail-Wagging Snack Recipe
Homemade dog treats like these not only cater to your dog’s taste buds but also provide essential nutrients. Peanut butter is rich in protein and healthy fats, while oats deliver fiber that can aid digestion. Eggs add a solid protein boost and support healthy skin and fur, while the optional add-ins—like carrots or apples—offer vitamins and antioxidants.
Best Ways to Serve and Pair This Dish
Your furry friend deserves the best, so serve these treats in style! You can present them in a cute dog bowl, wrapped in a bandana as a gift for fellow dog owners, or during puppy gatherings for some fun socialization.
Pair these treats with a special outing—take your dog for a sunny stroll or a trip to the park, where they can showcase their homemade deliciousness to their friends. Treat time becomes a celebration of companionship!
FAQ Section
What type of mushrooms are best for Easy Baked Dog Treats: A Tail-Wagging Snack Recipe?
While the recipe focuses on dog-friendly ingredients, if you’d like to experiment with flavors, ensure that any mushrooms are safe for canine consumption. Generally, avoid using mushrooms in dog treats, as most commercial recipes won’t include them. Stick to wholesome ingredients like peanut butter, oats, and veggies!
Can I use dried garlic instead of fresh?
It’s best to avoid garlic altogether in dog treats, as it’s known to be toxic in larger quantities for dogs. Stick to dog-friendly seasonings for a wag-worthy treat.
How do I store leftover Easy Baked Dog Treats: A Tail-Wagging Snack Recipe?
Store your treats in an airtight container, and keep them refrigerated for up to a week. For longer-lasting treats, freeze them in a resealable bag. They will remain delicious for up to three months!
Can I freeze Easy Baked Dog Treats: A Tail-Wagging Snack Recipe?
Yes, you can absolutely freeze these treats! Just make sure they are completely cooled, then place them in a single layer in a freezer bag. This way, you can have a fresh supply of treats ready on hand!
Conclusion
If you’re like me, nothing warms your heart quite like watching your beloved pup enjoy a treat crafted with love. The process of making these Easy Baked Dog Treats: A Tail-Wagging Snack Recipe is not just about the end product but about the joy it brings both to you and your furry companion. There’s something comforting about sharing those tail-wagging moments knowing you’ve put your heart into it. Trust me, you’ll want to make this recipe again and again, and I promise your dog will thank you with every wag. So roll up your sleeves, gather those ingredients, and create a little happiness in your kitchen today!
Print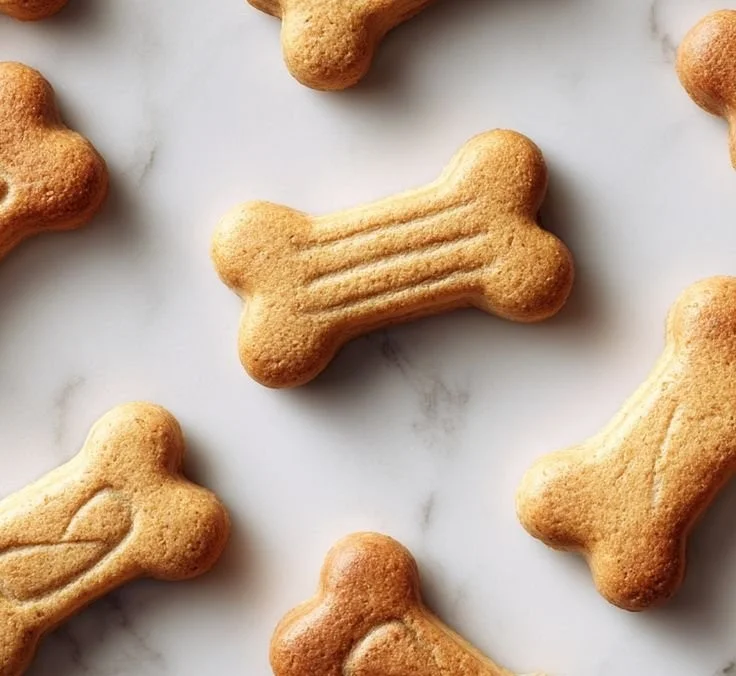
Easy Baked Dog Treats: A Tail-Wagging Snack Recipe
Homemade dog treats bursting with the flavors of peanut butter and oats, perfect for spoiling your furry friend.
- Total Time: 40 minutes
- Yield: 20 servings
Ingredients
- 1 cup unsweetened, xylitol-free peanut butter
- 1 egg
- 1 tablespoon honey (optional)
- 1 cup rolled oats
- 1 cup whole wheat flour (or gluten-free flour)
- 1/4 cup low-sodium broth or water
Instructions
- Preheat your oven to 350°F (175°C).
- Mix the peanut butter, egg, and honey in a large bowl until smooth.
- Incorporate the rolled oats and whole wheat flour, adding broth or water to form a cohesive dough.
- Knead the dough on a floured surface until it’s not sticky.
- Roll out the dough to about 1/4 inch thick and cut out shapes.
- Bake on a parchment-lined sheet for 20-25 minutes until golden.
- Cool completely before serving.
Notes
Store treats in an airtight container in the fridge for up to a week or freeze for longer storage.
- Prep Time: 15 minutes
- Cook Time: 25 minutes
- Category: Dog Treats
- Method: Baking
- Cuisine: Pet Food
- Diet: Dog-Friendly