There’s a certain joy that comes from watching a furry family member enjoy something you’ve made just for them. I’ll never forget the first time I made Dog Dental Treats: Tasty Chews for Happy, Healthy Teeth. It was a crisp autumn afternoon in Asheville, and I was in my cozy kitchen, surrounded by the earthy aroma of pumpkin and peanut butter. My pup, Oliver, sniffed curiously as I mixed the ingredients. He sat at my feet, tail wagging, eyes wide with anticipation. When the treats finally came out of the oven, golden brown and subtly aromatic, I could hardly contain my excitement. They were more than just chews; they were crafted with love and were a promise of happy, healthy teeth for my best friend. As I watched Oliver munch away, the crunching sounds echoed in my heart, reminding me that everything we do in the kitchen is about bringing joy and health to those we care for.
As we venture into the world of dog dental treats, let’s explore how we can combine flavors and nutrition into a chewy delight your canine companion will adore. These treats don’t just help maintain their pearly whites; they bring a splash of joy to their routines.
Flavor and Popularity
The Unique Flavor Profile of Dog Dental Treats: Tasty Chews for Happy, Healthy Teeth
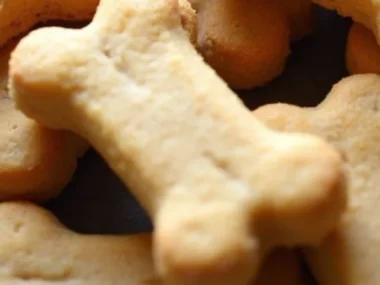
Dog Dental Treats do more than just clean teeth; they dance with delightful flavors that your furry friend is sure to enjoy. The star ingredients usually include pumpkin, peanut butter, and whole wheat flour. Pumpkin, with its natural sweetness and a hint of earthiness, is a wonderful source of fiber and vitamins. Peanut butter adds a rich, nutty flavor that most dogs can’t resist, plus it contributes protein and healthy fats to their diet. Combine these with a pinch of cinnamon for warmth, and you have a mouthwatering treat that will leave your pup begging for more.
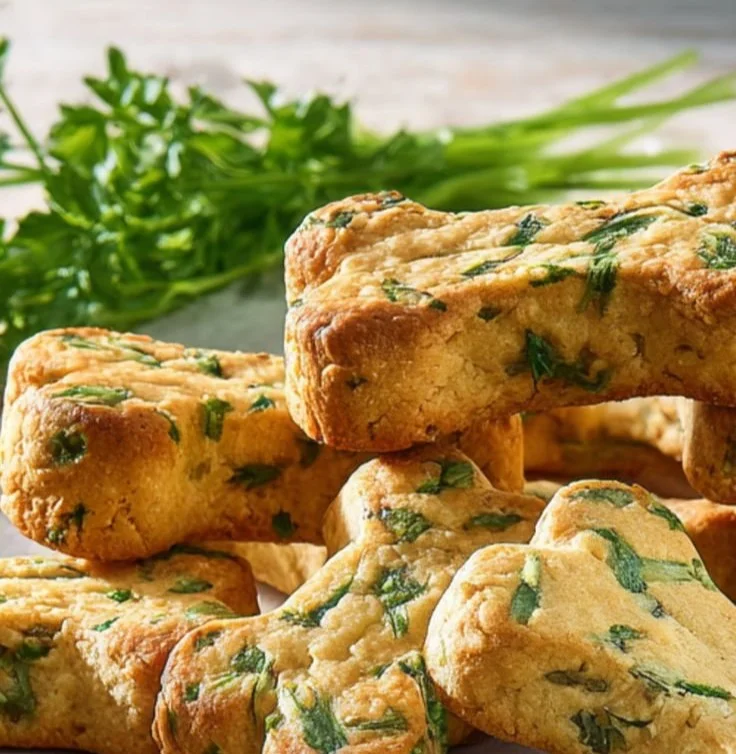
The texture is equally important; this is where the crunch of the baked treat comes in. You want a texture that’s firm enough to help scrub dogs’ teeth as they chew but soft enough to remain enjoyable. The winter months could call for a little extra comfort, so feel free to experiment with flavors like sweet potato or even sautéed spinach for added nutrients and a boost of freshness.
Why This Recipe Is a Family Favorite and Crowd-Pleaser
What makes these Dog Dental Treats a family favorite? It’s the bonds they forge. Whenever my family gathers, Oliver becomes the center of attention, and sharing these homemade goodies allows everyone to join in on the fun. When I pull these treats out, there’s an instant reaction—a few excited barks and tail wags. It becomes a ritual, a way of sharing love not just with Oliver, but with the whole family.
Every chew is a symbol of care and affection. Watching the kids play fetch with him, while he periodically checks to see if he can score another cookie, fills my heart with warmth. These treats aren’t just for dental health; they create moments, laughter, and cherished memories that linger long after snacks have been consumed.
Ingredients and Preparation
Essential Ingredients and Possible Substitutions
To make your very own Dog Dental Treats, gather the following essential ingredients to ensure your pup gets a delightful and nutritious experience:
- Pumpkin Puree: Use canned pumpkin, but always ensure it is pure, with no sugar or added spices.
- Peanut Butter: Choose a natural, unsweetened variety—check that it doesn’t contain xylitol, which is toxic to dogs.
- Whole Wheat Flour: This adds bulk, but if your pup has gluten sensitivities, you might consider using oat flour or a gluten-free blend.
- Egg: This acts as a binding agent, ensuring everything sticks together nicely.
- Cinnamon: Just a dash adds a warm flavor, and it’s a great antioxidant too!
If you want to get creative, feel free to swap or supplement these ingredients. Sweet potato can take the place of pumpkin, lending a different texture and flavor. You can also toss in some finely shredded carrot for an extra crunch, and don’t be afraid to introduce herbs like parsley, which not only freshens breath but also gives a pop of color.
Step-by-Step Recipe Instructions with Tips
Now, let’s get down to the nitty-gritty of making these Dog Dental Treats:
- Preheat your oven to 350°F (175°C) and line a baking sheet with parchment paper.
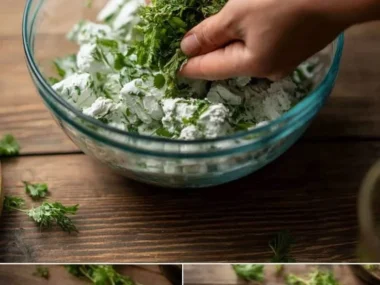
- In a mixing bowl, combine 1 cup of pumpkin puree, 1 cup of peanut butter, and 1 egg. Mix until smooth; this forms the base of your treats.
- Gradually add 2-3 cups of whole wheat flour, stirring in until you achieve a dough that holds its shape. If the dough feels too sticky, sprinkle in a bit more flour, a little at a time.
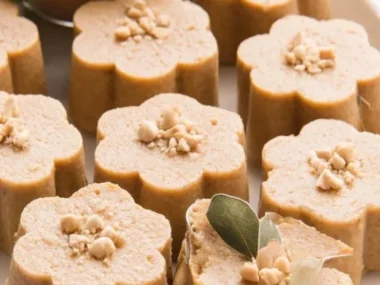
- Roll out the dough on a floured surface to about ¼ inch thick. Use cookie cutters to shape them into fun designs or simple squares.
- Place the treats on your prepared baking sheet and bake for about 25-30 minutes, until they are firm and golden.
- Let cool completely before serving them to your dog—this helps the texture solidify nicely.
A little tip: Always keep an eye on the last few minutes of baking to ensure you don’t overcook them. You want them crunchy but not burnt.
Cooking Techniques and Tips
How to Cook Dog Dental Treats: Tasty Chews for Happy, Healthy Teeth Perfectly
The cooking process is straightforward, but there are some techniques that can enhance the final product. The warmth of the oven helps intensify the natural sweetness of the pumpkin and peanut butter. As you bake, the heavenly aromas will waft through your kitchen, creating a palpable excitement for both you and your dog.
For an additional kitchen adventure, consider double-baking your treats for an extra crunchy finish! After cooling, pop them back in the oven at a lower temperature for an additional 10-15 minutes to achieve that perfect crunch.
Common Mistakes to Avoid
Many aspiring bakers can encounter a few common pitfalls when making Dog Dental Treats. Here are a few things to keep in mind:
- Miscalculating Ingredients: Ensure you measure your pumpkin and peanut butter accurately. Too much liquid can result in sogginess, while too little flour can leave you with a crumbly mess.
- Oven Temperature: Always preheat the oven. A cold oven can lead to uneven baking, leaving treats soft when they should be perfectly crunchy.
- Skipping the Cool Down: Allow treats to cool completely before serving. This ensures they firm up just right.
Health Benefits and Serving Suggestions
Nutritional Value of Dog Dental Treats: Tasty Chews for Happy, Healthy Teeth
Let’s talk about health. These Dog Dental Treats are not only tasty; they are packed with nutrients! The pumpkin is rich in fiber, helping keep your dog’s digestive system in tip-top shape. Peanut butter offers protein that contributes to lean muscle and is full of healthy fats. Additionally, whole wheat flour brings vitamins and minerals that aid your dog’s overall well-being.
Regularly incorporating these treats into your dog’s diet can support gum health and overall dental hygiene. Plus, making treats at home allows you to customize them, ensuring you know exactly what your beloved pet is consuming.
Best Ways to Serve and Pair This Dish
These treats stand well on their own but feel free to get imaginative with how you present them. You can create a doggy snack bar at home—set out a variety of treats for your pup, perhaps even combining them with other homemade goodies like banana bites or sweet potato chews.
Another idea is to crumble these Dog Dental Treats over your pup’s regular food for added excitement and flavor. It elevates their mealtime experience, making every bite a little more fun!
FAQ Section
What type of mushrooms are best for Dog Dental Treats: Tasty Chews for Happy, Healthy Teeth?
While mushrooms aren’t a typical ingredient in dog treats, if you choose to incorporate them for flavor or health benefits, opt for safe varieties like button or shiitake mushrooms. Ensure they are thoroughly cooked, chopped finely, and used sparingly, as some dogs may have sensitivities.
Can I use dried garlic instead of fresh?
It’s best to avoid garlic altogether in dog treats. While fresh garlic in small quantities is usually safe for dogs, dried garlic can be more concentrated, which potentially poses health risks to your pet.
How do I store leftover Dog Dental Treats: Tasty Chews for Happy, Healthy Teeth?
Store your treats in an airtight container at room temperature for up to two weeks. If you’d like to keep them longer, consider freezing them. Just make sure they are well-wrapped and separated to avoid them sticking together.
Can I freeze Dog Dental Treats: Tasty Chews for Happy, Healthy Teeth?
Absolutely! Freezing is a fantastic way to keep your treats fresh. Just make sure you let them cool completely, and then store them in a freezer-safe container. They can typically be stored for about three months. When you’re ready to use them, let them thaw at room temperature or warm them slightly in the microwave.
Conclusion
If you’re like me, the kitchen holds a special place in your heart—it’s a world of warmth, love, and delightful aromas where we create memories. Making Dog Dental Treats: Tasty Chews for Happy, Healthy Teeth isn’t just about giving Oliver something to munch on; it’s about pouring joy into every bite he takes. There’s something comforting about knowing that you’re providing healthy, homemade snacks that contribute to his happiness and wellbeing.
So, gather your ingredients and dive into this simple yet rewarding adventure! Trust me, you’ll want to make these again and again. You might even find yourself whipping up batches to share with friends’ furry friends—after all, kindness and joy are best when shared!
Print
Dog Dental Treats: Tasty Chews for Happy, Healthy Teeth
Delicious homemade dog treats made with pumpkin and peanut butter, designed to promote dental health and delightful crunch.
- Total Time: 45 minutes
- Yield: 30 treats
Ingredients
- 1 cup pumpkin puree (canned, pure)
- 1 cup peanut butter (natural, unsweetened)
- 1 egg
- 2-3 cups whole wheat flour (or oat flour/gluten-free blend)
- 1 dash cinnamon
Instructions
- Preheat your oven to 350°F (175°C) and line a baking sheet with parchment paper.
- Combine 1 cup of pumpkin puree, 1 cup of peanut butter, and 1 egg in a mixing bowl. Mix until smooth.
- Add 2-3 cups of whole wheat flour gradually, stirring until you achieve a dough that holds its shape.
- Roll out the dough on a floured surface to about ¼ inch thick. Use cookie cutters to shape.
- Place the treats on the prepared baking sheet and bake for about 25-30 minutes.
- Let cool completely before serving to your dog.
Notes
Always measure ingredients accurately and preheat the oven for best results. Allow treats to cool completely for the right texture.
- Prep Time: 15 minutes
- Cook Time: 30 minutes
- Category: Dog Treats
- Method: Baking
- Cuisine: American
- Diet: Dog-friendly