There’s a distinct warmth in my kitchen, especially when I recall the delightful day I first decided to create DIY Green Dog Breath Mints for my beloved pup, Daisy. Nestled in my cozy Asheville home, the aroma of fresh ingredients filled the air, blending joy and purpose as I sought to craft something special for her. With a curious spirit, I ventured into a realm where traditional recipes meet a love for our four-legged friends. Flipping through a dog-friendly cookbook, I stumbled upon this unique recipe and knew I had to try my hand at these little minty wonders.
As I gathered fresh herbs, like parsley and peppermint, the vibrant green hues reminded me of the beautiful mountains surrounding my home. The process was simple yet exhilarating, as I measured and mixed with enthusiasm, imagining Daisy’s tail wagging with every bite. There’s nothing quite like seeing a creature you cherish enjoy something you made with love. The first whiff of those fresh, earthy mints awakened my senses, and I couldn’t help but smile. If you’re like me, a devoted pet owner who loves to pamper your furry friend, making DIY Green Dog Breath Mints will certainly be a slice of joy shared between you and your pup.
Flavor and Popularity
The Unique Flavor Profile of DIY Green Dog Breath Mints
When it comes to the flavor profile of DIY Green Dog Breath Mints, the delicate balance of freshness is all thanks to the vibrant ingredients we use. Parsley lends an earthy, herbal note, while mint adds a refreshing punch that’s not only delightful for your dog but is also beneficial for freshening breath. Together, they create a combination that dogs find appealing, and you’ll appreciate knowing they contain no artificial additives.
The enticing aroma wafting from the mixture will remind you of summer gardens filled with the scents of nature. Simply inhaling the fragrance while you prepare these mints evokes memories of walking through my grandmother’s herb garden, where I learned to appreciate fresh flavors. The beauty of this recipe lies in its simplicity and the fact that it’s entirely customizable. Add a few drops of fish oil or even a sprinkle of bacon-flavored seasoning if your pup enjoys a meaty twist. The versatility means you can create a recipe that caters specifically to your dog’s taste preferences, making each batch uniquely theirs.
Why This Recipe Is a Family Favorite and Crowd-Pleaser
The appeal of DIY Green Dog Breath Mints extends beyond just your pup—they often become a talking point amongst friends and family, too! The first time I shared these mints at a gathering, I watched in delight as one by one, each guest praised the thoughtfulness behind such a recipe. Animals hold a special place in our hearts, and the idea of making something specifically for our furry family members captures our affection in the most wholesome way.
My friends, many of whom are fellow dog owners, appreciated that not only were these mints simple to make, but they were also a guilt-free treat crafted with love, care, and natural goodness. Everyone loves to hear the story behind the creation, and sharing this recipe turned into a bonding experience, allowing us to swap dog care tips and tricks over tea. After all, celebration is at the heart of cooking, regardless of whether you’re preparing a meal for humans or giving our pets a little something special.
Ingredients and Preparation
Essential Ingredients and Possible Substitutions
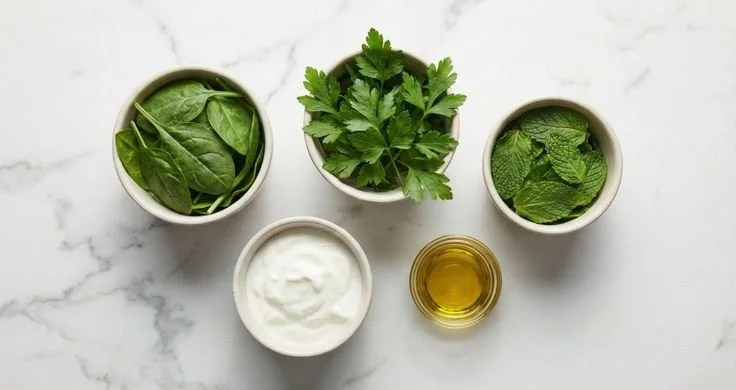
To make DIY Green Dog Breath Mints, gather the following essential ingredients:
- Fresh parsley: This herb is key, thanks to its breath-freshening properties.
- Fresh mint: A natural breath freshener that dogs adore.
- Whole wheat flour: This forms the base of the mints. You can use oat flour or coconut flour as a gluten-free option.
- Stock (chicken or vegetable): Use low-sodium to keep it healthy for your pup.
- Garlic powder: Just a pinch adds flavor without overpowering.
If you’re looking for substitutions, here are some options that work beautifully without sacrificing taste:
- For parsley, you can substitute with cilantro if your dog enjoys the flavor.
- Swap whole wheat flour for gluten-free flour blends if your pup has sensitivities.
- If you wish, try using broth made from beef (low-sodium) for a richer flavor profile.
Step-by-Step Recipe Instructions with Tips
-
Preheat your oven to 350°F (175°C) and line a baking sheet with parchment paper. This makes for easy cleanup and prevents sticking.
-
In a food processor, combine 1 cup of fresh parsley, 1 cup of fresh mint, and 1 tablespoon of garlic powder. Blend until finely chopped.
-
Add 1 cup of whole wheat flour and ½ cup of low-sodium chicken stock to your mix. Pulse until the dough comes together. If the dough feels too wet, sprinkle in a little more flour; if it’s too dry, add a bit more stock.
-
On a lightly floured surface, roll out the dough to about ¼ inch thickness. Use a cookie cutter to cut out little shapes—bone shapes are always a hit!
-
Arrange the cutouts on your prepared baking sheet and bake them for about 20 minutes, or until they are golden brown and firm.
-
Allow the mints to cool completely before serving. I like to store them in an airtight container in the fridge for freshness.
Cooking Techniques and Tips
How to Cook DIY Green Dog Breath Mints Perfectly
To ensure your DIY Green Dog Breath Mints come out perfectly crunchy and flavorful, be sure to keep an eye on them in the oven. Each oven varies; therefore, you might need to adjust the baking time slightly. Make sure they are golden brown—this means they’ve cooked through and will maintain their shape as they cool.
Being attentive while mixing the ingredients can also make a difference. The goal is to create a dough that sticks together without being too sticky. It should have a smooth texture and be pliable. If necessary, knead the dough with a bit of flour or liquid until you achieve that perfect balance.
Common Mistakes to Avoid
One common mistake is using too much garlic. While fresh garlic has its benefits, dogs can be sensitive to it. Stick to the recommended measurement, and if you’re unsure, it’s best to leave it out.
Another error occurs when baking too long—this can make the mints hard as a rock and uncomfortable for your dog to chew. Always conduct a gentle touch test and take them out slightly before they reach total hardness, as they will firm up as they cool.
Health Benefits and Serving Suggestions
Nutritional Value of DIY Green Dog Breath Mints
Homemade dog treats often hold more nutritional value than many store-bought options. With fresh herbs, you’re offering your dog the vitamins and minerals found in parsley and mint, which can aid in digestion and promote overall health.
For instance, parsley is rich in vitamins A, C, and K, supporting your dog’s immune system. Mint can soothe stomach issues and freshen breath, making it an excellent addition to your dog’s diet—especially for those choppy breath days, like when they sneak a bite of something they shouldn’t from the trash!
Best yet, knowing you’re preparing a treat from natural ingredients means you can adjust it to your dog’s dietary needs. Always consult your veterinarian when introducing new homemade treats.
Best Ways to Serve and Pair This Dish
When serving these breath mints, I suggest offering them as a post-meal treat. It can become a lovely tradition in your home—after dinner, your furry friend gets a mint fresh from the oven! Pair it with water and a cozy pet spot for your dog to enjoy their minty prize.
You can also introduce DIY Green Dog Breath Mints into a doggy playdate scenario by offering them as treats during playtime. They’re great for sharing, and who doesn’t love seeing happy tails wagging all around?
FAQ Section
What type of mushrooms are best for DIY Green Dog Breath Mints?
Mushrooms are not a primary ingredient in this recipe. Instead, fresh herbs like parsley and mint are used for their breath-freshening properties. Make sure to stick to dog-safe ingredients for your DIY treats.
Can I use dried garlic instead of fresh?
It’s advisable to use caution with garlic products, as even dried garlic can be harmful in large amounts. This recipe requires just a pinch for flavor. If you’re unsure, it may be best to omit it altogether.
How do I store leftover DIY Green Dog Breath Mints?
Store any leftover mints in an airtight container in the fridge. They should stay fresh for up to a week, ensuring your pup can enjoy them for days after baking!
Can I freeze DIY Green Dog Breath Mints?
Absolutely! You can freeze these mints in a sealed container or zip-top bag for up to three months. Just allow them to thaw before treating your pup.
Conclusion
If you’re like me, making DIY Green Dog Breath Mints for your furry companions is not just about creating something tasty but about expressing love through food. The joy of watching your dog enjoy a treat crafted from wholesome ingredients warms the heart. There’s something comforting about knowing you control what your pets consume. So, roll up your sleeves, gather those herbs, and indulge in this joyful baking adventure. Trust me, you’ll want to make this again and again!
Print
DIY Green Dog Breath Mints
Homemade dog treats that freshen your pup’s breath using natural ingredients like parsley and mint.
- Total Time: 35 minutes
- Yield: 20 mints
Ingredients
- 1 cup fresh parsley, chopped
- 1 cup fresh mint, chopped
- 1 tablespoon garlic powder
- 1 cup whole wheat flour
- ½ cup low-sodium chicken or vegetable stock
Instructions
- Preheat your oven to 350°F (175°C) and line a baking sheet with parchment paper.
- In a food processor, combine parsley, mint, and garlic powder, and blend until finely chopped.
- Add whole wheat flour and chicken stock, pulsing until a dough forms.
- Roll out the dough on a floured surface to about ¼ inch thick and cut into shapes.
- Arrange the shapes on the baking sheet and bake for about 20 minutes or until golden brown.
- Allow cooling completely before storing in an airtight container in the fridge.
Notes
Adjust baking time as necessary; avoid using too much garlic.
- Prep Time: 15 minutes
- Cook Time: 20 minutes
- Category: Dog Treat
- Method: Baking
- Cuisine: Pet Cuisine
- Diet: Homemade