There’s a certain warmth that fills the kitchen when you’re cooking for someone you love, and this feeling doubles when that someone is your furry friend. I remember the first time I ventured into the world of DIY Dog Food. My rescue pup, Charlie, with his wagging tail and soulful eyes, was my constant companion, always there with an eager tilt of his head as I rifled through the pantry. It hit me one sunny afternoon that I could whip up something special for him—something wholesome and hearty. The thought of preparing DIY Dog Food excited me; it was a chance to blend my culinary curiosity with care for my best buddy.
As the aroma of simmering ingredients filled the air, I felt joy bubbling inside, knowing that I was crafting something nourishing just for him. The mixture of vegetables, meats, and a dash of love came together in a way that made me chuckle. Who knew that playing chef for my canine companion could spark such happiness? The moment I set the dish down, and Charlie sniffed at the homemade meal with his tail wagging a mile a minute, I knew I’d created a new tradition in our home. Cooking like this—something simple yet deeply fulfilling—made me realize that food is so much more than sustenance; it’s a way to bond, to communicate love, and to share joy.
Now, let’s dive into all the delightful aspects of DIY Dog Food, ensuring your furry friend gets the nutritious goodness they deserve!
Flavor and Popularity
The Unique Flavor Profile of DIY Dog Food
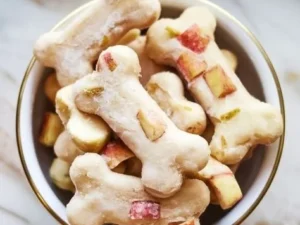
DIY Dog Food is a celebration of flavors and aromas that peek through every meal. Think of a blend of fresh ingredients; the earthiness of carrots, the tenderness of chicken or beef, and the unforgettable essence of herbs and spices. When you cook up a batch, you infuse love and care into the mix, making it far more appealing than commercial dog food.
The beauty of DIY Dog Food lies in your ability to customize it. Does your dog enjoy the sweetness of pumpkin? Perhaps a hint of parsley? My Charlie loves a pinch of thyme mixed into his meals, as it complements the meat beautifully and turns his bowl into a mini feast. It’s a wonderful way to experiment with different flavors, all while keeping your pup healthy and happy.
Why This Recipe Is a Family Favorite and Crowd-Pleaser
If you think your furry friend will be the only one savoring the flavor of DIY Dog Food, think again. I can’t count the times I’ve had friends over, and while they were awed by the traditional southern dishes on the table, little Charlie often stole the show with his soulful eyes, waiting for a taste of his homemade dish. It’s a delightful conversation starter—who would have thought that DIY Dog Food could bridge the gap between friends and fun storytelling?
The love and care that goes into crafting your dog’s meals resonate deeply with those who understand that food is the essence of joy. It’s not just about making something edible; it’s about sharing a moment and building relationships, both human and canine. And what could be better than a dog who hangs on your every word, hoping for a sample of your kitchen creations?
Ingredients and Preparation
Essential Ingredients and Possible Substitutions
To create a perfect batch of homemade dog food, you’ll want to gather a few essential ingredients. Here’s what’s typically included:
Protein: Choose a quality source like chicken, beef, or turkey. Ground meat is often quicker to cook and easier to handle.
Vegetables: Carrots, peas, green beans, and sweet potatoes are great options. These add fiber and important nutrients!
Grains (optional): Brown rice or quinoa can serve as an excellent base, providing necessary carbohydrates.
Fat: A teaspoon of olive oil or coconut oil helps with coat health and adds a hint of essential fatty acids.
Herbs: Fresh herbs, like parsley, can enhance flavor and provide digestive benefits.
If you need substitutions, don’t fret! Have some leftover rotisserie chicken? That’ll work wonderfully. You can easily swap out different veggies based on what’s in season or what you have in the fridge. No need for perfection here; just keep it wholesome and beneficial for your furry buddy!
Step-by-Step Recipe Instructions with Tips
Let’s put it all together! Here’s a straightforward guide to crafting that delicious DIY Dog Food:
-
Preparation: Start by washing and chopping your chosen vegetables. Make sure they’re appropriately sized so they cook evenly and are easy for your dog to munch on.
-
Cook the Protein: In a large skillet, brown your meat over medium heat. If you’re using ground meat, stir it frequently until fully cooked. Drain any excess fat.
-
Add the Vegetables: Toss in your chopped veggies and stir them into the cooked meat. Sauté for about 3-5 minutes until slightly tender but still colorful. This is where the magic begins!
-
Include Grains (if using): If you’ve chosen to add grains, stir in your cooked brown rice or quinoa at this stage. It’s an excellent time to mix in your olive oil too!
-
Cool and Serve: Let the mixture cool before serving. You can store it in the fridge for up to a week or portion it out into containers, ready for your pup’s meals.
Tips to Remember:
- Always consult with your vet for any additional dietary needs specific to your dog.
- Avoid ingredients like onion and garlic, which can be harmful to dogs.
- Don’t skip on letting the mixture cool completely before serving it to your pet!
Cooking Techniques and Tips
How to Cook DIY Dog Food Perfectly
The secret to splendid DIY Dog Food lies in your approach. By taking care to balance flavors and textures, you ensure that every bowl is both tasty and nutritious. Don’t hesitate to get creative with ingredients; add pumpkin for fiber, or try some spinach for a folate boost.
Mixing ingredients well is key, but so is the cooking technique. When you sauté veggies, don’t overcook them; keep them bright and firm. The crunchier, the better for your pup’s teeth!
Common Mistakes to Avoid
When crafting your homemade dog food, it’s essential to sidestep some common pitfalls:
- Ignoring Food Safety: Always ensure that meats are cooked thoroughly to avoid potential health risks.
- Over-seasoning: Dogs have different taste buds; keep things simple. Avoid salt and seasonings that could be harmful.
- Neglecting Nutritional Balance: While it’s tempting to throw in whatever is around, remember that dogs require a balanced diet just like we do. Consult a vet if you’re unsure.
Health Benefits and Serving Suggestions
Nutritional Value of DIY Dog Food
DIY Dog Food can be incredibly nutritious. When you prepare food at home, you have full control over the ingredients, allowing you to cater to your dog’s specific dietary needs. Fresh proteins provide the building blocks for muscle, while wholesome grains and veggies supply fiber and essential nutrients.
Additionally, since you’ll be avoiding preservatives and added sugars that often come in commercial dog food, you’ll find that your dog’s coat shines brighter, energy levels soar, and digestion improves.
Best Ways to Serve and Pair This Dish
The beauty of homemade dog food is that it can be served in various ways! Some dogs prefer it fresh and warm, while others will happily munch on it straight from the fridge. Pairing the food with a bit of water for hydration is crucial, especially after a hearty meal.
You might find that serving it as a topper on dry kibble elevates both meals to a new level, tempting even the pickiest eater. And, just as I enjoy having a poorly-made southern delight after a long day, a splash of fun makes mealtime more joyful for your pup too!
FAQ Section
What type of mushrooms are best for DIY Dog Food?
When it comes to mushrooms, opt for safe varieties like button or cremini mushrooms—these are not only safe for dogs but also add a delightful earthy flavor to their meals. Avoid mushrooms from the wild as many can be toxic to pets.
Can I use dried garlic instead of fresh?
It’s best to skip garlic altogether, as it can be harmful to dogs. Stick with fresh, dog-friendly herbs like parsley or basil instead to keep your recipes safe and healthy.
How do I store leftover DIY Dog Food?
Store any leftovers in an airtight container in the refrigerator for up to a week. Make sure it’s cool before transferring to avoid condensation, which can lead to spoilage.
Can I freeze DIY Dog Food?
Absolutely! You can portion out servings and store them in freezer-safe containers. Freezing is a great way to keep it fresh, and you can simply thaw the desired amount when needed.
As a loving dog owner, I can’t stress enough how rewarding it is to see your pet enjoy the fruits of your labor. It’s about creating something special and knowing every bite is packed with care and goodness.
Cooking for your dog can be as joyful as cooking for anyone else in your family, if not more so. If you’re like me and find fulfillment in sharing the precious bond with your furry friend through homemade meals, I warmly invite you to try your hand at this DIY Dog Food. There’s something comforting about knowing every ingredient, every step is a sign of your love. Trust me; you’ll want to make this again and again!
Print
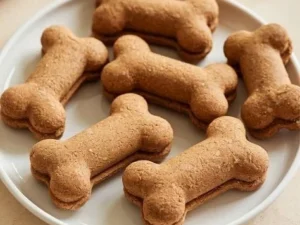
DIY Dog Food
A wholesome and nutritious homemade dog food recipe crafted with love for your furry friend.
- Total Time: 45 minutes
- Yield: 4 servings
Ingredients
- 2 lbs ground chicken, beef, or turkey
- 1 cup carrots, chopped
- 1 cup peas
- 1 cup green beans
- 1 cup sweet potatoes, chopped
- 1 cup brown rice or quinoa (optional)
- 1 tablespoon olive oil or coconut oil
- 1 tablespoon parsley, chopped (optional)
Instructions
- Start by washing and chopping your chosen vegetables.
- Cook the protein in a large skillet over medium heat until browned.
- Add the chopped veggies and stir into the cooked meat. Sauté for 3-5 minutes.
- Include grains (if using) like brown rice or quinoa, and mix in the olive oil.
- Cool the mixture before serving to your dog.
Notes
Always consult with your vet for your dog’s dietary needs. Avoid using harmful ingredients like onion and garlic.
- Prep Time: 15 minutes
- Cook Time: 30 minutes
- Category: Dog Food
- Method: Cooking
- Cuisine: Homemade
- Diet: Non-Vegetarian