When I think back to my first time making Christmas Tree Cake Pops, the memories feel as fresh as the icing on each little treat. It was a chilly December afternoon, the kind where the aroma of pine needles mingled with the warmth of baking in the kitchen. I had just flicked on our beloved holiday tunes, each note filling our home with a sense of nostalgia. I remember gathering my three grandchildren around the table, their eager eyes sparkling with excitement as we prepared to create something magical together. As we rolled the cake into perfect little bites and dipped them in vibrant green chocolate, I felt that beautiful mix of joy and love that comes from sharing something special with family.
These Christmas Tree Cake Pops have become much more than a festive dessert—they’re a symbol of our time spent together, laughing and creating. The way we decorated them with sprinkles and candy stars made me smile wider with every pop we finished. Each bite tastes of sweet memories, and I can’t help but feel grateful for the tradition we’ve formed. So whether you’re ushering in the holiday spirit or simply looking for a fun project to do with the kids, I promise you’ll fall in love with these delightful little cake pops.
Table of Contents
Flavor and Popularity
The Unique Flavor Profile of Christmas Tree Cake Pops
The beauty of Christmas Tree Cake Pops lies in their delightful flavor combination. These charming treats provide a burst of sweetness with just the right amount of richness. The cake interior, often made with vanilla or chocolate cake mix, lends itself to a moist, tender texture that feels like a cozy hug. Dipping them in silky smooth green chocolate—often flavored with a hint of almond or vanilla—adds a luscious touch that elevates each bite. The finishing touches, from colorful sprinkles to shiny edible glitter, not only enhance the visual appeal but also bring a layer of fun crunch that kids and adults alike absolutely adore.
Most impressively, they’re versatile! You can experiment with different cake flavors—think red velvet for a festive twist or even a spice cake to complement the season’s warmth. The imaginative process of crafting these cake pops becomes as enjoyable as indulging in them. With each flavor profile, you’re bound to spark everyone’s taste buds while creating an enjoyable experience in the kitchen.
Why This Recipe Is a Family Favorite and Crowd-Pleaser
Christmas Tree Cake Pops have a way of bringing people together. They double as a seasonal treat and an interactive experience that gets everyone involved. Whether you’re making them for a holiday party or as a festive snack at home, you can count on these pops to delight kids and adults. They inspire laughter and joyful memories as family members gather to decorate their creations, each adding their personal touch.
Every successful batch leads to little conversations about family traditions and favorite holiday moments. “Remember when we made these last year?” or “Can you believe how fast we decorated them?” These interactions bring our family closer together, and let’s be honest: everyone loves to share a sweet treat.
Ingredients and Preparation
Essential Ingredients and Possible Substitutions
To make perfect Christmas Tree Cake Pops, gather the following essential ingredients:

- Cake Mix: Choose your favorite flavor—vanilla or chocolate works beautifully, but don’t hesitate to get creative!
- Eggs and Oil: These will help bind the cake mix and keep it moist. Follow the instructions on your cake mix for precise amounts.
- Frosting: Store-bought or homemade, this will help mold the cake into pops. Cream cheese frosting can add a delightful zing!
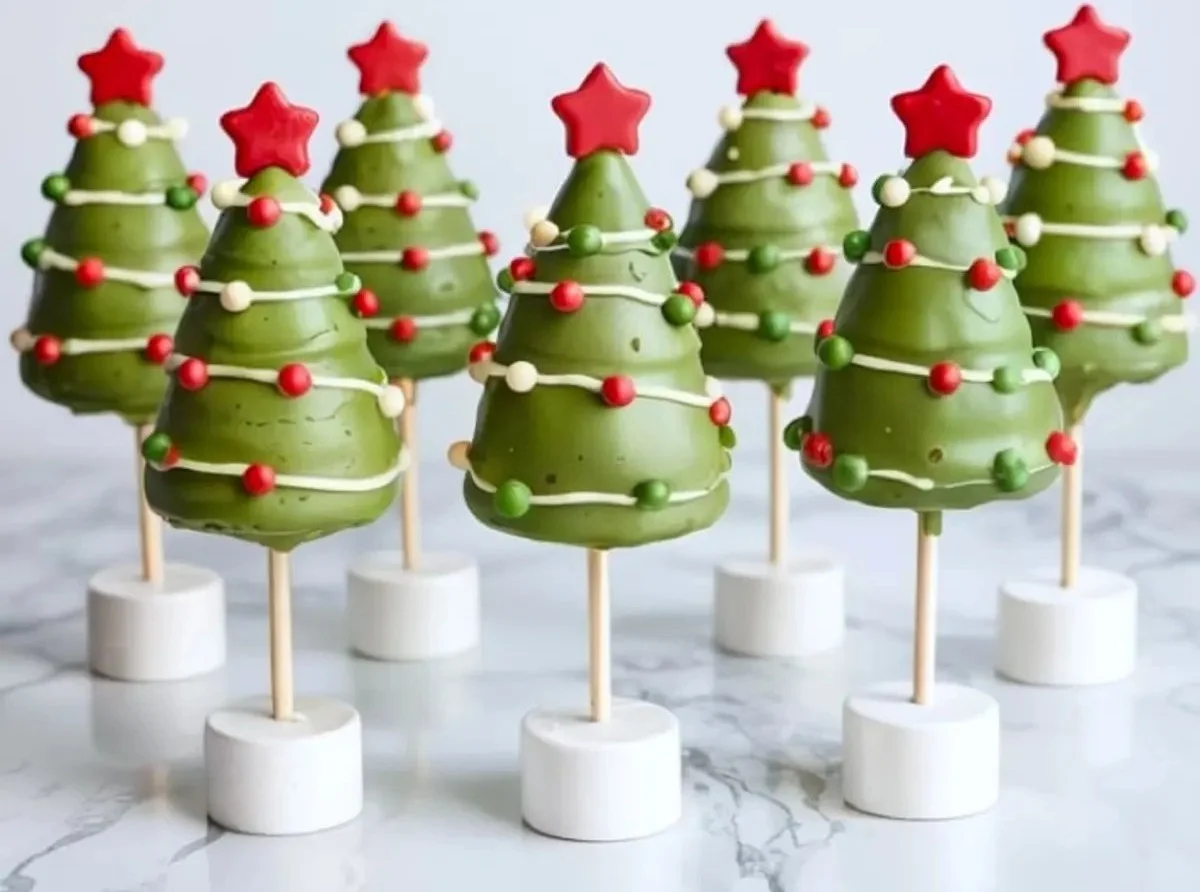
- Candy Melts: Green candy melts are key for that iconic Christmas tree look. You can also use chocolate or other colors for diversity.
- Decorative Sprinkles: Go wild! Use whatever your heart desires—think edible glitter, mini marshmallows, or candy stars for embellishment.
- Lollipop Sticks: Make sure you have sturdy sticks that can support your cake pops.
If you’re feeling adventurous, consider substitutions. Instead of frosting, try enriching your cake pops with peanut butter or melted chocolate for extra creaminess. For a healthier twist, experiment with Greek yogurt instead of frosting, although the taste may vary a bit. You can also use dairy-free options for candy melts to cater to different dietary preferences.
Step-by-Step Recipe Instructions with Tips
Now that you have your ingredients, let’s dive into the fun part.
Bake the Cake: Start by preparing your cake mix according to the package instructions. Once baked, allow the cake to cool completely.
Crumble the Cake: Once cool, crumble the cake into a large mixing bowl. It should be fine and fluffy, almost resembling sand.
Mix in the Frosting: Add in a few tablespoons of frosting. Use your hands or a spatula to combine until it holds together when squeezed. You want a consistency that’s moist but not drippy.
Form the Pops: Roll the cake mixture into small, tree-shaped balls (like tiny Christmas trees!) and place them on a lined baking sheet. Don’t fret about perfection—each one can be a bit unique!
Chill the Pops: Pop the baking sheet into the refrigerator for 30 minutes, allowing your pops to set. This makes them easier to handle later.
Melt the Candy Coating: While waiting, melt your green candy melts in a microwave-safe bowl. Heat in short increments, stirring until smooth.
Dip and Decorate: Remove the pops from the fridge and dip the tip of each lollipop stick into the melted candy before inserting it into the cake pop. This helps the stick stay put. Then, dip each pop into the melted candy until well-coated. Allow any excess to drip off before decorating.
Add Sprinkles: While the coating is still wet, top with your festive sprinkles and glitters! Allow them to dry completely upright in a styrofoam block or a cake pop stand.
Cooking Techniques and Tips
How to Cook Christmas Tree Cake Pops Perfectly
Cooking these pops is more of a crafting session than traditional cooking. Here are some tips to ensure your success:
- Room Temperature Ingredients: Ensure your ingredients like eggs and butter (if used) are at room temperature for even mixing.
- Chilling is Key: Don’t skip the chilling step. It stabilizes the pops and lets you work with them more easily.
- Warm Melts: Stick to a medium-low setting while melting candy to avoid scorching. If it gets too thick, a teaspoon of shortening can help smooth it out.
Common Mistakes to Avoid
- Overmixing: When combining cake crumbles with frosting, avoid overmixing. You want a well-combined mixture but don’t make it mushy.
- Skipping the Chill: If you’re tempted to skip the chilling step, think twice. If they’re warm, they may fall apart upon dipping.
- Dragging the Stick Through Coating: Instead of dragging the stick through the melted coating when dipping, just submerge it straight down. This preserves the shape.

Health Benefits and Serving Suggestions
Nutritional Value of Christmas Tree Cake Pops
While cake pops are undoubtedly a sweet treat, they can also offer some nutritional satisfactions when made right. Depending on the ingredients you choose, you can provide small portions of protein and even fiber if you incorporate whole grain cake mix or use nut-based toppings. Using less frosting or substituting with natural sweeteners can cut down on excess sugar while still satisfying cravings.
Best Ways to Serve and Pair This Dish
Serve these delightful Christmas Tree Cake Pops on a lovely platter adorned with fresh holly leaves or red and green napkins for that added festive glimmer. Pair them with mugs of rich hot cocoa or a spiced apple cider for a cozy holiday gathering. They also make lovely gifts when wrapped in cellophane and tied with a pretty ribbon!
FAQ Section
What type of mushrooms are best for Christmas Tree Cake Pops?
Even though mushrooms may not be directly related to Christmas Tree Cake Pops, if you’re looking to add flavor to savory dishes during the holiday season, consider shiitake or cremini mushrooms. They add a delicious umami touch to various holiday recipes!
Can I use dried garlic instead of fresh?
While using dried garlic is certainly possible, fresh garlic offers a more vibrant flavor that complements many dishes. For a well-rounded taste, consider using fresh garlic in your savory preparations, while reserving dried garlic for when fresh isn’t available.
How do I store leftover Christmas Tree Cake Pops?
Store any uneaten cake pops in an airtight container at room temperature for up to three days. If they are coated in chocolate, they last longer—up to a week! Always ensure they’re completely cooled before storing.
Can I freeze Christmas Tree Cake Pops?
Absolutely! These treats can be frozen if wrapped individually in plastic wrap and placed in an airtight container. When you’re ready to enjoy them, thaw them in the refrigerator overnight without unwrapping, and they’ll taste just as delicious!
Conclusion
If you’re like me, the holidays are a time filled with recipes that not only satisfy hunger but nourish the heart. These Christmas Tree Cake Pops offer a beautiful blend of tradition and creativity, bringing loved ones closer together through the joy of cooking and sharing memories. There’s something comforting about gathering the family around the table, watching wide eyes light up as the cake pops take shape. Trust me, you’ll want to make this again and again. Their whimsical charm and delightful flavors make them a holiday staple in our home—so why not spread that joy to yours? Get those ingredients ready, and let’s create something special together!
Print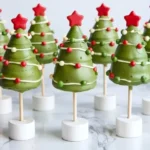
Christmas Tree Cake Pops
Delightful Christmas Tree Cake Pops coated in green chocolate and decorated with festive sprinkles, perfect for holiday celebrations.
- Total Time: 60 minutes
- Yield: 24 cake pops
Ingredients
- 1 box of cake mix (flavor of choice: vanilla or chocolate)
- 2 eggs
- 1/4 cup of vegetable oil
- 1/2 cup of frosting (store-bought or homemade)
- 2 cups green candy melts
- Decorative sprinkles (edible glitter, mini marshmallows, candy stars)
- Lollipop sticks
Instructions
- Bake the cake according to package instructions and allow to cool completely.
- Crumble the cooled cake in a large mixing bowl until it resembles sand.
- Add a few tablespoons of frosting and mix until it holds together when squeezed.
- Form the mixture into small tree-shaped balls and place on a lined baking sheet.
- Chill the pops in the refrigerator for 30 minutes.
- Melt the green candy melts in a microwave-safe bowl until smooth.
- Dip the tip of each lollipop stick into the melted candy, then insert it into the cake pop.
- Dip each pop into the melted candy until well-coated and allow excess to drip off.
- While the coating is still wet, add festive sprinkles and allow to dry completely.
Notes
Ensure ingredients like eggs are at room temperature for even mixing. Chilling the pops is crucial for easier handling.
- Prep Time: 30 minutes
- Cook Time: 30 minutes
- Category: Dessert
- Method: Baking
- Cuisine: American
- Diet: Vegetarian