There’s something so special about the bond we share with our furry friends. I remember the first time I decided to whip up a batch of 3-Ingredient Tuna Dog Treats for my beloved pup, Charlie. It was a rainy afternoon in Asheville, and the skies were as gray as my grandmother’s old cast iron skillet. The gentle sound of rain tapping against the window felt like the perfect setting for some homemade goodness. As I gathered my ingredients—canned tuna, an egg, and oat flour—I could almost hear Charlie’s excited tail thumping against the floor in anticipation.
My heart warmed as I recalled all the times I’d watched my grandma bake treats for our family pets. The joy on their faces when they feasted on her creations was something I wanted to replicate with Charlie. The allure of sharing that happiness with him drew me into the kitchen, and with each step, I felt a lovely connection to my roots. The smell of the tuna wafting through the air was like an invitation to create something special—something that would nourish not just his belly but his spirit too. Little did I know that these delights would quickly become a staple in our home, bringing joy and wagging tails each time I pulled them from the oven.
Flavor and Popularity
The Unique Flavor Profile of 3-Ingredient Tuna Dog Treats
When you think of dog treats, you might imagine bland, dry snacks that fail to excite your pup’s palate. But 3-Ingredient Tuna Dog Treats are anything but ordinary! The key ingredient, tuna, offers a rich, oceanic flavor that dogs simply adore. It’s packed with protein, and its natural oils make for a sumptuous treat. Coupled with the binding power of the egg, which adds that luscious, gooey texture, and the oat flour, which brings a bit of heartiness, these treats are a flavorful feast for your furry companion.
Moreover, the beauty of these treats is the ease with which they come together—our gregarious canine friends can easily understand the good intentions behind this endeavor. With just three simple ingredients, they form a combination that delights the tastebuds while being easy on the digestive system. Add in the nostalgia of homemade goodness, and you’ve created a tail-wagging sensation!
Why This Recipe Is a Family Favorite and Crowd-Pleaser
The charm of 3-Ingredient Tuna Dog Treats lies not only in their delectable taste but also in their simplicity. From the first time I made them, the recipe quickly became a family favorite—not just for Charlie but also for friends’ pets who would come over for playdates. It’s funny how pets have their unique personalities, yet you can see their eyes light up at the sight of a homemade treat.
Every time I break out this recipe, it feels like hosting an edible gathering. Friends arrive, and their pups instantly know: treat time is here! It’s a delightful way to bond with furry friends and showcase my love for cooking from the heart. I often make these treats during special occasions or whenever I want to show Charlie just how much he means to me. The joy of sharing these treats goes beyond the kitchen; it becomes a delightful ritual that strengthens friendships and spreads happiness in our little community.
Ingredients and Preparation
Essential Ingredients and Possible Substitutions
To create these delightful 3-Ingredient Tuna Dog Treats, you’ll need just three essential ingredients:
- Canned Tuna: Opt for tuna in water, not oil. The natural flavors will shine through, and it’s a lean protein source.
- Egg: This ingredient binds the mixture together while adding essential nutrients for your pup.
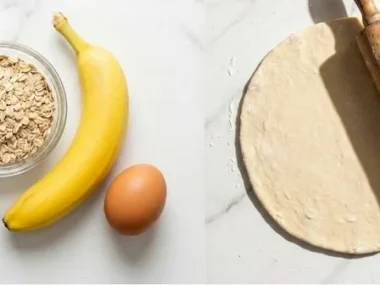
- Oat Flour: It’s wholesome and provides a wonderfully chewy texture. If you don’t have oat flour, grinding rolled oats in a blender will work just as well.
While these are the trusty staples, don’t hesitate to get creative! If your dog is grain-free, you can substitute oat flour with brown rice flour. Additionally, you can mix in chopped carrots or spinach for added nutrition and flavor. Just ensure that any additions are safe for canine consumption.
Step-by-Step Recipe Instructions with Tips
Ready to make these tasty treats? Here’s how to do it step-by-step:
-
Preheat the Oven: Start by preheating your oven to 350°F (175°C). This step ensures even cooking and that our treats will have a golden-brown hue.
-
Mix Ingredients: In a mixing bowl, combine one can of drained tuna, one egg, and one cup of oat flour. Use a fork to mash the mixture until it’s well combined. It can be a bit sticky, but resist the urge to add extra flour! The egg will help hold everything together as it bakes.
-
Form Treats: Using your hands, form small balls or flat shapes, depending on your preference. You can use cookie cutters to make fun shapes as well! Place them on a baking sheet lined with parchment paper, ensuring they are spaced apart.
-
Bake to Perfection: Bake the treats for about 20 minutes or until they turn a nice, golden brown. Let them cool completely before serving them to your furry friend.
-
Store Appropriately: Store your treats in an airtight container in the refrigerator. They should last about a week. For longer storage, freeze them for up to three months.
Feel free to experiment with the shapes and sizes, just keep in mind that smaller treats may bake more quickly.
Cooking Techniques and Tips
How to Cook 3-Ingredient Tuna Dog Treats Perfectly
Baking the perfect 3-Ingredient Tuna Dog Treats is all about attention to detail. The mixture should really come together nicely, so don’t rush when combining the ingredients. A bit of patience at this stage makes for treats that are chewy on the inside and slightly crispy on the outside.
If you’re using a mixer, consider using a paddle attachment for even mixing. That helps to integrate all those flavors perfectly! Also, watch the oven closely towards the end of cooking. Each oven is unique, and you know your treats are ready when they emit a delicious tuna aroma and are golden brown all around.
Common Mistakes to Avoid
While making dog treats is straightforward, a few common pitfalls can trip us up. First, avoid using oil-packed tuna, as it can make the treats too greasy. Second, don’t overbake them—keeping them a tad chewy ensures a delightful experience for your pet. Lastly, make sure to let the treats cool completely before letting your dog dive in; a warm treat might just burn their eager little tongue!
Health Benefits and Serving Suggestions
Nutritional Value of 3-Ingredient Tuna Dog Treats
Not only are these 3-Ingredient Tuna Dog Treats a tasty snack, but they also come packed with nutritional benefits. Tuna provides ample protein and essential omega-3 fatty acids, which promote shiny coats and healthy skin. Eggs add vital vitamins and minerals while supporting strong muscles. Finally, oat flour offers digestible fibers that aid in maintaining a healthy digestive system.
When you bake wholesome treats for Charlie, I love knowing I’m not just treating him but also treating him right. It’s a little token of love that shows, in our vocabulary, good food equals good health.
Best Ways to Serve and Pair This Dish
While your pets will surely enjoy these treats straight from the jar, why not elevate the fun a little? You can serve them crumbled on top of their regular meals for a special touch or even create a cute puppy treat cake for a birthday celebration! A dollop of pumpkin puree drizzled over would not only be festive but also nutritious—a delicious pairing indeed.
Watching your furry friend enjoy the fruits of your labor? Let me tell you, it’s pure joy!
FAQ Section
What type of tuna is best for 3-Ingredient Tuna Dog Treats?
For making 3-Ingredient Tuna Dog Treats, look for canned tuna in water. It’s leaner and healthier, which benefits your pup’s nutrition. Avoid tuna packed in oil, as it can make the treats too greasy for their little tummies.
Can I use dried garlic instead of fresh?
In this treat recipe, it’s best to skip garlic altogether, as it can be harmful to dogs in larger quantities. Stick to the basic three ingredients for a safe and delicious option.
How do I store leftover 3-Ingredient Tuna Dog Treats?
Store your freshly baked treats in an airtight container in the refrigerator where they will last for up to a week. Ensure they are completely cool before sealing them to keep them crisp and fresh.
Can I freeze 3-Ingredient Tuna Dog Treats?
Absolutely! Freezing these treats is a great way to extend their shelf life. Just place them in a freezer-safe container or a ziplock bag, and they’ll be good for up to three months. When you want to treat your pup, simply let them thaw and enjoy!
Conclusion
If you’re like me and have a special place in your heart for your four-legged members of the family, you’ll absolutely love making 3-Ingredient Tuna Dog Treats. There’s something comforting about creating treats that bring joy—both for your furry friend and yourself—from the heart of your home. Trust me, you’ll want to make this again and again, not just for Charlie, but to share the joy with friends and their pups too! It’s more than just a recipe; it’s a celebration of love and the happiness that food can bring into our lives. Happy baking!
Print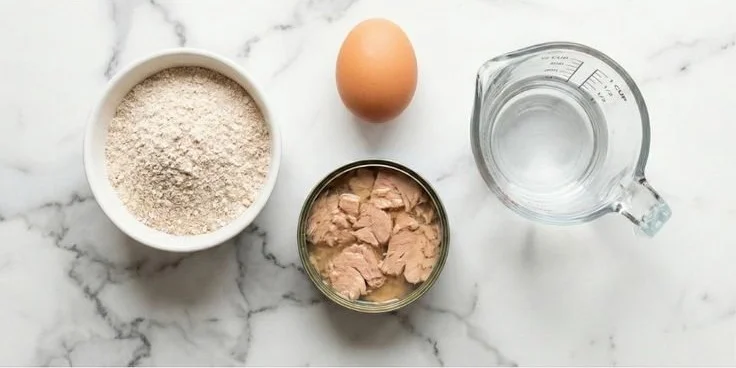
3-Ingredient Tuna Dog Treats
Quick and easy homemade dog treats made with just three ingredients: canned tuna, egg, and oat flour. Perfect for pampering your furry friend!
- Total Time: 30 minutes
- Yield: 12 servings
Ingredients
- 1 can of canned tuna in water, drained
- 1 egg
- 1 cup oat flour
Instructions
- Preheat the oven to 350°F (175°C).
- Mix the tuna, egg, and oat flour in a mixing bowl until well combined.
- Form the mixture into small balls or flat shapes and place them on a baking sheet lined with parchment paper.
- Bake for about 20 minutes or until golden brown.
- Let cool completely before serving.
- Store in an airtight container in the refrigerator for up to a week or freeze for up to three months.
Notes
Feel free to experiment with shapes and add safe ingredients like chopped carrots or spinach for added nutrition.
- Prep Time: 10 minutes
- Cook Time: 20 minutes
- Category: Dog Treats
- Method: Baking
- Cuisine: Pet Food
- Diet: Dog-Friendly